A homemade marshmallow fluff recipe creates a silky, glossy spread that’s lighter, fresher, and more flavorful than the store-bought version. Homemade marshmallow fluff is made by whipping egg whites, sugar syrup, and vanilla extract into a glossy, cloud-like spread. The process takes about 20–30 minutes and produces a fluff that’s fresher, less sweet and more versatile than the store-bought version.
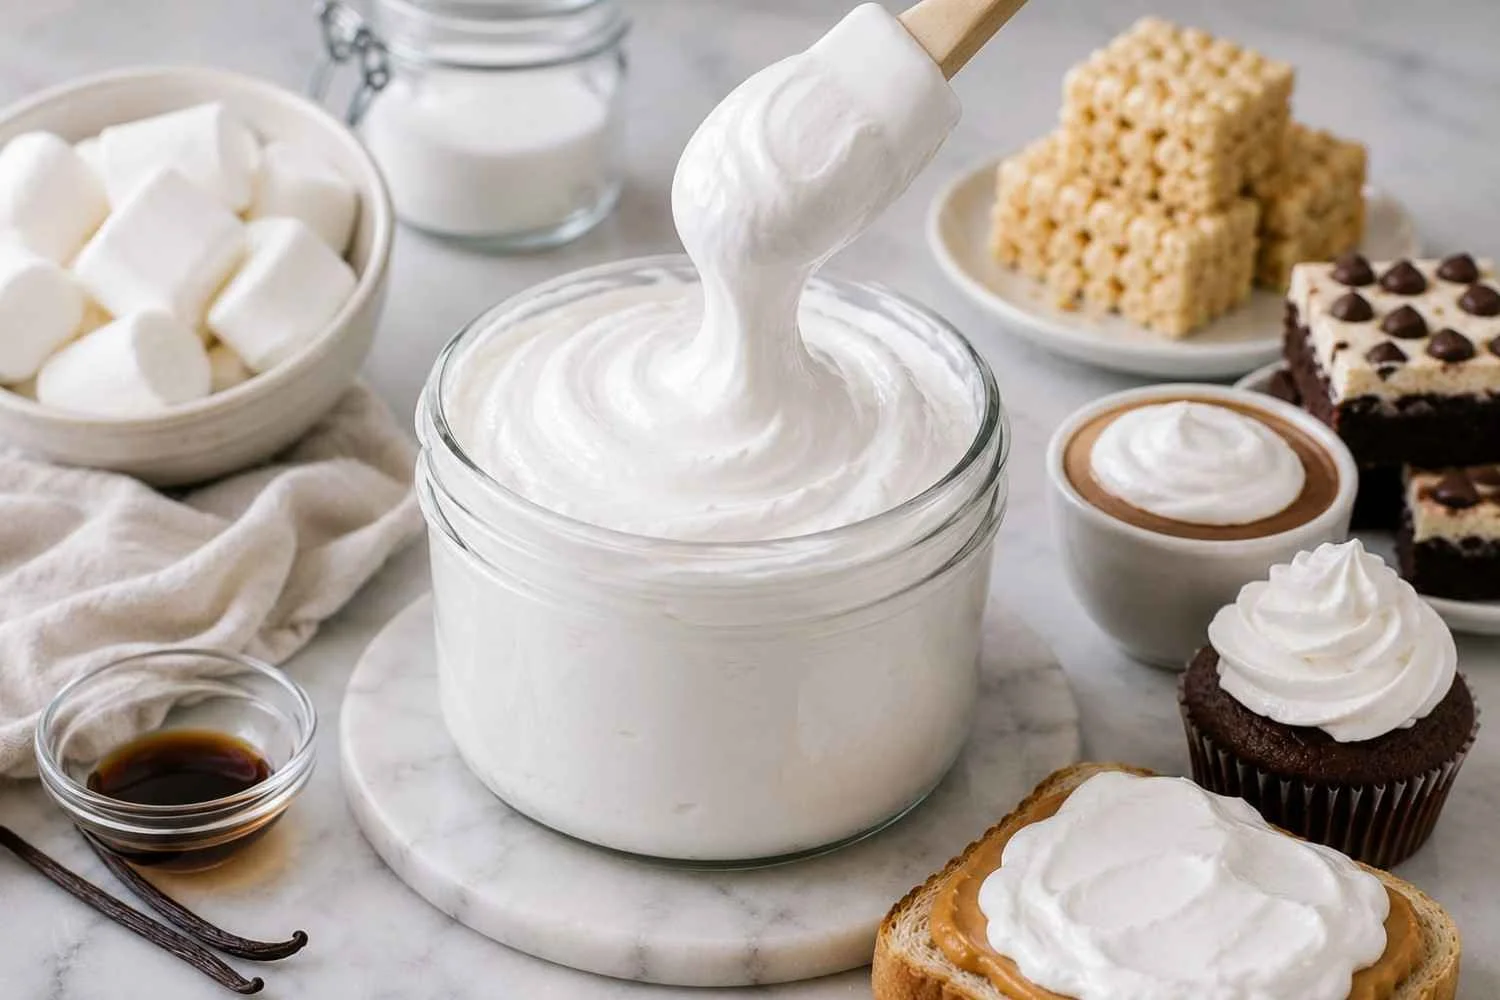
Homemade Marshmallow Fluff Recipe
Yield: About 3 cups
Prep Time: 10 minutes
Cook Time: 15–20 minutes
Total Time: 25–30 minutes
Ingredients
1: 3 large egg whites, at room temperature
2: ¾ cup (150g) granulated white sugar
3: ½ cup (120ml) light corn syrup
4: ¼ teaspoon cream of tartar
5: 1 teaspoon pure vanilla extract
6: Pinch of salt

Ingredient Notes
Egg Whites
Room temperature egg whites whip up faster and create more volume than cold ones. Separate your eggs at least 30 minutes before starting. Make absolutely sure there’s no yolk even a small amount of fat can prevent the whites from whipping properly.
Corn Syrup
Light corn syrup keeps the fluff smooth and stable by preventing sugar crystallization. Dark corn syrup will change the flavor and color, so stick with light.

Cream of Tartar
This stabilizes the egg whites, helping them hold their structure during and after whipping. If you don’t have it on hand, a small squeeze of lemon juice works as a substitute.
Vanilla Extract
Pure vanilla extract gives the best flavor. Imitation vanilla can leave a slightly artificial aftertaste in something this delicate.
Sugar
Standard granulated white sugar works perfectly here. Avoid powdered sugar, which contains cornstarch and can affect texture.

Equipment Needed
1: Stand mixer with a whisk attachment (or a hand mixer with a large bowl)
2: Small heavy-bottomed saucepan
3: Candy thermometer (recommended but not essential)
4: Silicone spatula
5: Measuring cups and spoons
A stand mixer is strongly preferred for this recipe—you’ll need to pour hot syrup into the bowl while the mixer is running, which is tricky to manage with a hand mixer alone. If a stand mixer isn’t available, enlist a helper to pour while you hold the hand mixer.
How to Make Marshmallow Fluff
Step 1: Prepare Your Workstation
Clean your mixing bowl and whisk attachment thoroughly. Any grease residue will interfere with the egg whites. Wipe them down with a paper towel dampened with white vinegar, then dry completely.
Step 2: Cook the Sugar Syrup
Combine the granulated sugar and corn syrup in a small heavy-bottomed saucepan with 2 tablespoons of water. Stir once to combine, then place over medium heat. Do not stir once the mixture starts to heat—this encourages crystallization. Cook until the syrup reaches 240°F (115°C), also known as the soft-ball stage. If you don’t have a candy thermometer, drop a small amount into cold water—it should form a soft, pliable ball.

Step 3: Start Whipping the Egg Whites
About 2 minutes before your syrup reaches temperature, add the egg whites, cream of tartar, and salt to your mixer bowl. Whip on medium speed until soft peaks form.
Step 4: Add the Hot Syrup
With the mixer running on low, carefully pour the hot syrup in a slow, steady stream down the side of the bowl. Avoid pouring it directly onto the whisk—this can splatter and cause burns.
Step 5: Whip to Stiff Peaks
Once all the syrup is incorporated, increase the mixer speed to high. Whip for 7–10 minutes until the fluff is thick, glossy, and holds stiff peaks. The bowl should feel just slightly warm to the touch, not hot.

Step 6: Add Vanilla
Reduce mixer speed to low, add the vanilla extract, and mix for another 30 seconds until combined.
Your fluff is ready to use immediately or transfer to a clean jar for storage.
Expert Tips
- Don’t rush the syrup. Cooking the sugar over medium heat (rather than high) gives you more control and reduces the risk of burning.
- Stream, don’t dump. Pouring the hot syrup slowly ensures it incorporates evenly and doesn’t scramble the egg whites.
- Whip long enough. Under-whipped fluff will be runny. Keep going until the mixture is bright white and holds peaks that don’t droop.
- Use a clean, dry bowl. Any trace of fat or moisture can ruin the egg whites before they even get started.
- Warm your spatula. If the fluff sticks while you’re spreading it, a quick dip of your spatula into warm water makes it much easier to work with.
Common Mistakes to Avoid

1: Letting Yolk Contaminate the Whites
One of the most common and most frustrating mistakes. If this happens, start with fresh eggs rather than trying to salvage the batch.
2: Overcooking the Sugar
Syrup cooked past 245°F (118°C) produces a firmer, grainier fluff. Pull it off the heat as soon as it hits 240°F.
3: Skipping the Thermometer
Eyeballing syrup temperature is risky for beginners. A cheap candy thermometer takes the guesswork out completely.
4: Adding Vanilla Too Early
Adding vanilla while the mixture is still hot can cause some of the flavor to cook off. Wait until the fluff has cooled slightly before adding it.
Flavor Variations

Once you’ve nailed the base recipe, it’s easy to customize.
1: Chocolate Fluff
Sift 2 tablespoons of unsweetened cocoa powder into the fluff during the last minute of whipping.
2: Strawberry Fluff
Add 2 tablespoons of freeze-dried strawberry powder along with the vanilla.
3: Peppermint Fluff
Swap the vanilla for ½ teaspoon of peppermint extract. Pairs beautifully with chocolate.
4: Brown Sugar Fluff
Replace granulated sugar with light brown sugar for a warm, caramel-like flavor.
5: Lemon Fluff
Use lemon extract instead of vanilla and add ½ teaspoon of lemon zest for a bright, citrusy twist.
Best Ways to Use Marshmallow Fluff
1: Fluffernutter Sandwiches
Spread peanut butter and marshmallow fluff on white bread. A classic American combination that never goes out of style.
2: Hot Chocolate Topping
Spoon a generous dollop into your mug instead of regular marshmallows. It melts into the drink beautifully.

3: Fruit Dip
Mix with cream cheese and a splash of vanilla for a quick, crowd-pleasing fruit dip. For a more complete recipe, try this creamy fruit dip with marshmallow fluff, which pairs the sweet, airy base with fresh fruit. .
4: Frosting
Use as a light, glossy frosting for cupcakes or layer cakes. It pipes surprisingly well when freshly made. It also works as a delicious topping for homemade mexican chocolate marshmallow cookies.
5: Rice Crispy Treats
You can also use the same idea in Rice Krispie treats with marshmallow cream for a soft, chewy version of this classic dessert
6: S’mores
Skip the campfire and spread fluff directly onto graham crackers with chocolate.
Desserts Made with Marshmallow Fluff
1: Mississippi Mud Pie
A dense chocolate brownie base topped with fluff and a rich chocolate ganache.
2: Whoopie Pies
Soft chocolate cake rounds sandwiched with a generous layer of marshmallow fluff filling.
3: Fluff Fudge
A 3-ingredient fudge made with chocolate chips, sweetened condensed milk, and marshmallow fluff. Check out full easy recipe version of marshmallow fluff fudge.
4: Sweet Potato Casserole
Spread homemade fluff over roasted sweet potato and broil until golden. A Thanksgiving staple.
5: Marshmallow Fudge Brownies
You can also use the same idea in marshmallow rice crispy cakes for a soft, chewy version of this classic dessert.
6: Sour Marshmallow
For another tangy marshmallow variation, try a sour marshmallow recipe for a bright flavor that contrasts with the sweetness of traditional marshmallow fluff.
Storage Instructions
At Room Temperature
Store in an airtight jar for up to 2 days.
In the Refrigerator
Keep for up to 2 weeks. The fluff will firm up slightly when cold—let it come to room temperature before using, or give it a brief stir.
Freezing
Not recommended. Freezing changes the texture significantly, leaving the fluff watery and deflated once thawed.
Always use a clean, dry spoon to scoop fluff from the jar. Moisture or food particles can cause it to break down faster.
Conclusion
Making homemade marshmallow fluff from scratch is easier than it looks and rewards you with a silky, glossy spread that’s fresh, fluffy, and incredibly versatile. Once you’ve made a batch, you can use it in everything from popcorn coated with marshmallows to sandwiches, frostings, and other easy dessert homemade marshmallow fluff that’s ready to elevate your favorite desserts and sweet snacks.
Homemade marshmallow fluff takes less than 30 minutes, uses six simple ingredients, and produces results that far surpass anything from a grocery store shelf. Once you’ve made it yourself, it’s hard to go back.
Start with the base recipe, get comfortable with the process, then explore the flavor variations. And if you’re looking for ways to use up a whole batch, the dessert ideas above are a great place to start.