A homemade marshmallow recipe creates soft, fluffy marshmallows with a light vanilla flavor and a texture that’s far better than store bought versions. If you’re wondering how to make marshmallows from scratch, this guide covers everything you need, from the ingredients to step by step instructions for perfect homemade marshmallows every time and proper storage of marshmallow.
Homemade marshmallows are made by blooming gelatin, cooking a sugar syrup to 240°F, whipping both together until thick and fluffy, then letting the mixture set for at least 4 hours before cutting. The result is a pillowy, melt in your mouth treat that blows store bought versions out of the water.
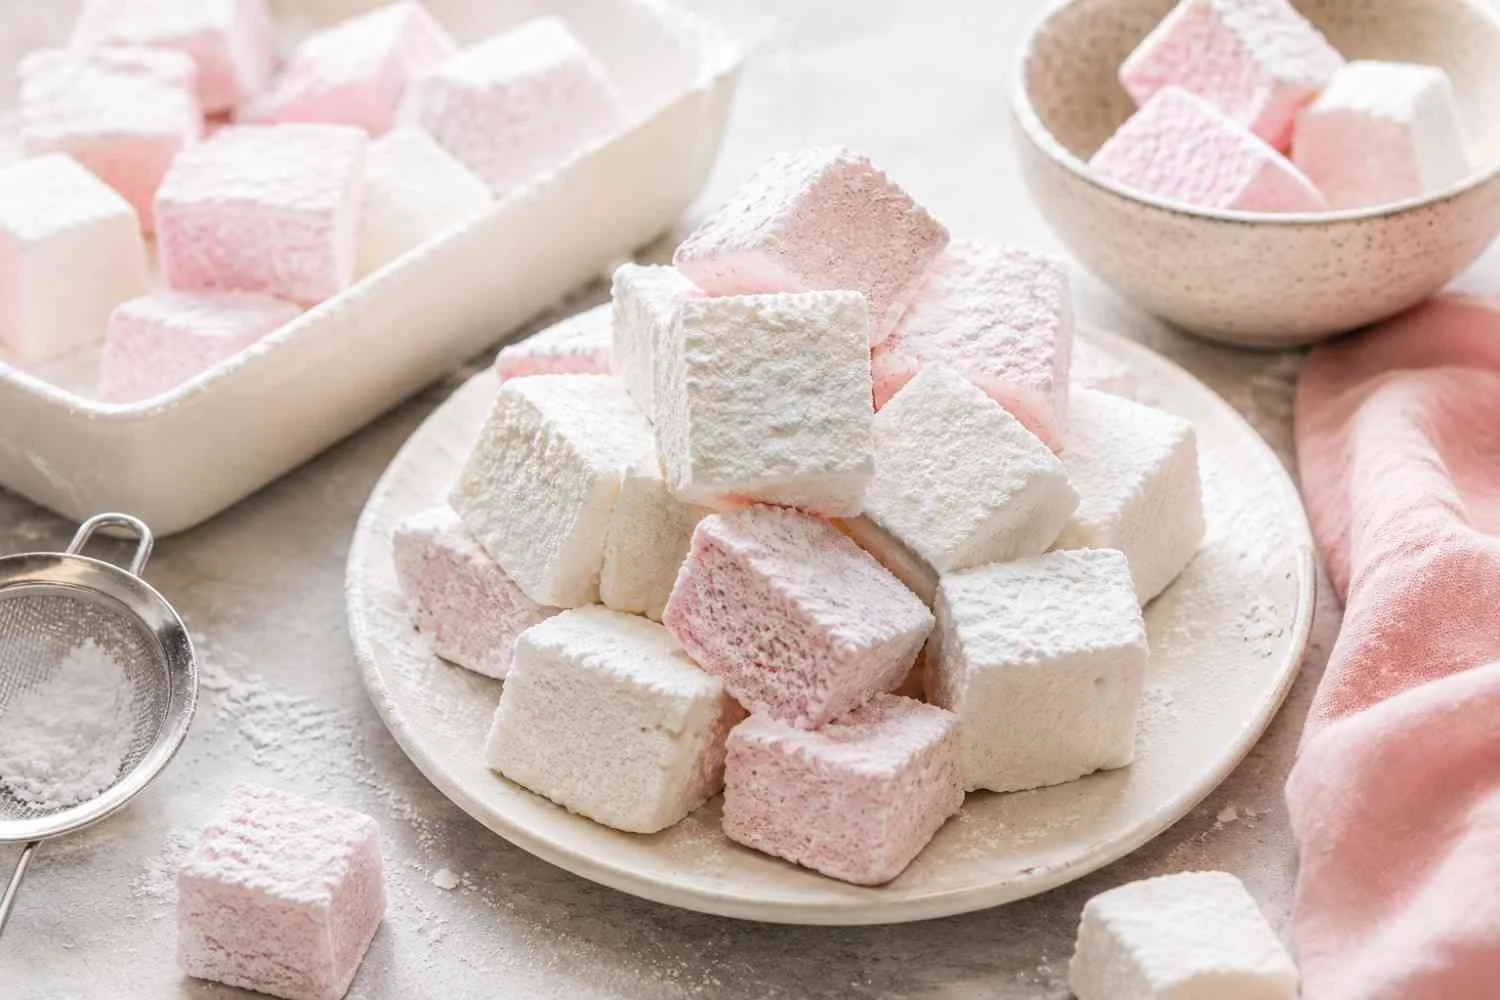
Marshmallow Recipe Ingredients
Prep Time: 35 minutes
Set Time: 4 hours (or overnight)
Total Time: 4 hours 45 minutes
1: 3 packets (21g) unflavored powdered gelatin
2: 1 cup ice-cold water, divided in half
3: 1½ cups (12 oz) granulated sugar
4: 1 cup light corn syrup
5: ¼ teaspoon kosher salt
6: 1 teaspoon pure vanilla extract
7: ¼ cup confectioners’ sugar (for dusting)
8: ¼ cup cornstarch (for dusting)
9: Nonstick cooking spray
If you prefer avoiding corn syrup altogether, you can also make marshmallows without corn syrup using honey or other invert sugar alternatives, although the texture and flavor will be slightly different.
If you’d rather skip corn syrup, try this classic honey marshmallow recipe, which uses honey instead of corn syrup while still producing soft, fluffy marshmallows.

Equipment You’ll Need
1: Stand mixer with whisk
2: Candy thermometer
3: Small, deep saucepan
4: 9×13-inch baking pan (glass or ceramic preferred)
5: Offset spatula or lightly oiled spatula for spreading
6: Pizza wheel or sharp knife for cutting
7: Parchment paper or wax paper for storage
How to Make Homemade Marshmallows
Step 1: Bloom the Gelatin
Pour ½ cup of ice-cold water into the bowl of your stand mixer. Sprinkle all three packets of gelatin evenly over the surface. Stir briefly to combine, then set aside. The gelatin needs at least 5 minutes to absorb the water and soften this step is called “blooming.”

Step 2: Cook the Sugar Syrup
In a small, deep saucepan, combine the remaining ½ cup of cold water, granulated sugar, corn syrup, and kosher salt. Set over medium heat and stir until the sugar dissolves. Once the mixture begins to bubble, stop stirring entirely. Clip your candy thermometer to the side of the pan, making sure the bulb is fully submerged in the liquid. Raise the heat and cook until the syrup reaches exactly 240°F (the soft-ball stage). Remove from heat immediately.
Step 3: Whip the Mixture
Fit the stand mixer with the whisk attachment. With the mixer running on low speed, carefully and slowly pour the hot sugar syrup down the inner side of the bowl into the bloomed gelatin pouring it directly onto the whisk will splatter. Once all the syrup is added, gradually increase the speed to high. Whip for 12 to 15 minutes, until the mixture is very thick, brilliantly white, and has cooled to lukewarm (around 95°F). Add the vanilla extract in the final minute of whipping.

Step 4: Prepare the Pan
While the mixer runs, mix the confectioners’ sugar and cornstarch in a small bowl. Generously spray your 9×13-inch pan with nonstick cooking spray, then dust it with the sugar-cornstarch mixture, coating the bottom and all sides. Tap out any excess and set it aside.
Step 5: Spread and Set
Pour the marshmallow mixture into the prepared pan. Use a lightly oiled spatula to spread it evenly, and wet your hands to smooth out the top. Dust the surface with more of the sugar-cornstarch mixture. Leave uncovered at room temperature for at least 4 hours, or overnight for best results.

Step 6: Cut and Coat
Turn the set marshmallow slab out onto a cutting board. Use a pizza wheel or sharp knife dusted with the sugar-cornstarch mixture to cut into 1-inch squares. After cutting, dust all sides of each marshmallow with the remaining mixture to prevent sticking. Use a bit more if needed.
Store in an airtight container at room temperature, with layers separated by parchment paper, for up to 3 weeks.

Expert Tips for Soft & Fluffy Marshmallows
- Use ice-cold water for blooming. Warm water can prevent the gelatin from setting properly.
- Don’t stir the syrup once it starts boiling. Stirring agitates sugar crystals and can cause the syrup to seize.
- Make sure your thermometer bulb is fully submerged. A misread temperature is the most common reason marshmallows don’t turn out right (see: Common Mistakes below).
- For softer marshmallows, reduce the gelatin to just 2 packets. They’ll still hold their shape when cut but will have a creamier, slightly denser texture.
- Don’t rush the whipping. The mixture needs time to cool and aerate. Stopping early will give you a dense, gummy result.
- Grease everything that touches the marshmallow. Your spatula, your hands, your knife if it touches the mixture, oil it first.
- If you’re looking for an even lighter, airy texture, marshmallows made with egg whites offer a slightly different consistency while still being soft and fluffy.

Marshmallow Flavor Variations
Once you’ve nailed the base recipe, the flavor possibilities open up considerably.
1: Peppermint
Replace vanilla with ½ to 1 teaspoon of peppermint extract. Dust the top with crushed candy canes before it sets.
2: Lemon
Add 1 teaspoon of lemon extract and a tablespoon of lemon zest during the final minute of whipping.
3: Strawberry
Fold in 2 tablespoons of strawberry puree (reduced to a thick paste) during the last minute of whipping. Add a drop of pink food coloring for effect.
4: Gingerbread
Swap light corn syrup for dark corn syrup, omit the vanilla, and add 2 teaspoons ground ginger, 1½ teaspoons cinnamon, and ½ teaspoon cloves to the syrup before cooking.
5: Eggnog
Add 1 teaspoon freshly grated nutmeg to the syrup before cooking, and include ½ teaspoon rum extract alongside the vanilla.
6; Chocolate-Dipped
Once the marshmallows are fully set and cut, dip each one into melted chocolate. Set on parchment paper to firm up. Sprinkle with crushed nuts, sea salt, or peppermint crunch before the chocolate sets. If you enjoy homemade treats, you’ll also love our vanilla flavored marshmallows, which creates soft, fluffy marshmallows perfect for dipping in chocolate. Once the marshmallows are fully set and cut, dip each one into melted chocolate and let them set on parchment paper. For more decorating ideas and coating techniques, check out our chocolate covered marshmallow guide.
7; Toasted Coconut
Roll freshly cut marshmallows in toasted coconut flakes for a tropical twist.
Common Mistakes & How to Fix Them
1: The Syrup Went Past 240°F
Cooking the syrup too high into the hard-ball stage (250°F and above)—results in a dense, nougat-like candy rather than a light marshmallow. There’s no way to reverse this, so the lesson is to watch the thermometer carefully. If you end up with nougat, coat it in chocolate it’s delicious in its own right.
2: The Marshmallows Didn’t Set
This usually means the gelatin wasn’t properly bloomed, the syrup wasn’t hot enough, or the mixture wasn’t whipped long enough. Next time, ensure the gelatin is fully softened before adding the syrup, and verify your thermometer is accurate.
3: The Mixture Is Too Sticky to Work With
This is normal. Keeping your hands wet and your tools well-greased solves the problem. More dusting powder also helps when cutting.
4: The Marshmallows Deflated
Deflation typically happens when the mixture is poured into the pan before it’s cooled and thickened enough. Whip until the bowl no longer feels hot to the touch.
5: The Edges Are Crumbly or Dry
This usually means the marshmallows set too long before cutting, or the dusting mixture dried out the surface. Cut within 24 hours for the best texture.
Best Ways to Use Homemade Marshmallows
1: S’mores
Toast over an open flame for the ultimate campfire classic. Homemade marshmallows toast more evenly and melt more completely than store-bought.
2: Rice Crispy Treats
The improved flavor makes a noticeable difference. Melt your marshmallows slowly with butter, mix in cereal, and press into a pan.
3: Hot Cocoa Topper
Drop a few into a mug of hot chocolate. They melt slowly and add a creaminess that pre-packaged mini marshmallows just can’t match.
4: Dessert Skewers
Thread marshmallows onto skewers with strawberries, bananas, and graham crackers for a crowd-pleasing dessert platter. If you’re serving berry desserts, you can also try Strawberry Flavored Marshmallow Recipe.
5: Sweet Potato Casserole
Layer over the top and broil for 2 to 3 minutes until golden.
6: Gifting
Wrap individual marshmallows in twists of wax paper, arrange in a kraft box, and tie with twine. They make a genuinely thoughtful homemade gift.

What to Serve with Homemade Marshmallows
If you’re putting together a dessert spread, homemade marshmallows pair well with:
1: Hot Drinks
Hot chocolate, spiced cider, chai lattes, and coffee.
2: Dipping Sauces
Melted dark or milk chocolate, caramel sauce, or a tart raspberry coulis.
3: Baked Goods
Brownies, cookies, or a classic banana pudding where the marshmallows fold in as a light, creamy layer.
4: Fresh Fruit
Fresh strawberries or a citrus fruit salad cut through the sweetness beautifully.
5: Cheese Boards
For a more adventurous pairing, marshmallows alongside sharp cheddar, honeycomb, and walnuts work surprisingly well.
Can You Freeze Homemade Marshmallows?
Yes, homemade marshmallows freeze well. Wrap individual marshmallows in plastic wrap or wax paper, then transfer them into a zip lock freezer bag with as much air removed as possible. They’ll keep in the freezer for up to 3 months.
To thaw, leave them at room temperature for 30 to 60 minutes. Don’t microwave them to defrost. The sudden heat will cause them to melt or deflate.
One tip: freeze marshmallows before dipping them in chocolate. A cold marshmallow is much easier to dip and holds its shape as the chocolate sets.
Frequently Asked Questions
Can I Make Homemade Marshmallows Without a Stand Mixer?
You can use a hand mixer, but expect a longer whipping time potentially 20 minutes or more.
Why Do Marshmallow Recipes Use Corn Syrup?
Corn syrup is an invert sugar, meaning it interferes with the formation of sugar crystals during cooking. Without it, the syrup could crystallize and turn grainy. It also helps keep the finished marshmallows moist and soft over time.
How Long Do Homemade Marshmallows Last?
Stored in an airtight container at room temperature with parchment paper between layers, homemade marshmallows last up to 3 weeks. Frozen, they keep for up to 3 months.
Can I Make Marshmallows Without Corn Syrup?
It’s possible to substitute corn syrup with glucose syrup in a 1:1 ratio. Some bakers use honey, but it alters the flavor noticeably and can make the syrup harder to control.
Why Are My Marshmallows Not Fluffy?
The most common culprits are under-whipping, syrup that didn’t reach 240°F, or gelatin that wasn’t fully bloomed. The mixture should be very thick, white, and cool to the touch before it goes into the pan.
Can I Color Homemade Marshmallows?
Absolutely. Add a few drops of gel food coloring during the final 30 seconds of whipping. Gel coloring works better than liquid, as it won’t thin out the mixture.
Conclusion
Homemade marshmallows take time there’s no shortcut around the whipping and the setting. But the result is something genuinely special: a treat with a fresh, clean sweetness and a texture that no factory-made bag can replicate.
Make a batch for the holidays, give a try to classic old fashion marshmallow recipe.