Looking for a lemon marshmallow recipe? Homemade lemon marshmallows are made by combining a hot sugar syrup (cooked to 240–260°F) with bloomed gelatin and lemon juice, then whipping the mixture until fluffy. The result is a pillowy, tangy confection that sets overnight and keeps for up to one week at room temperature.
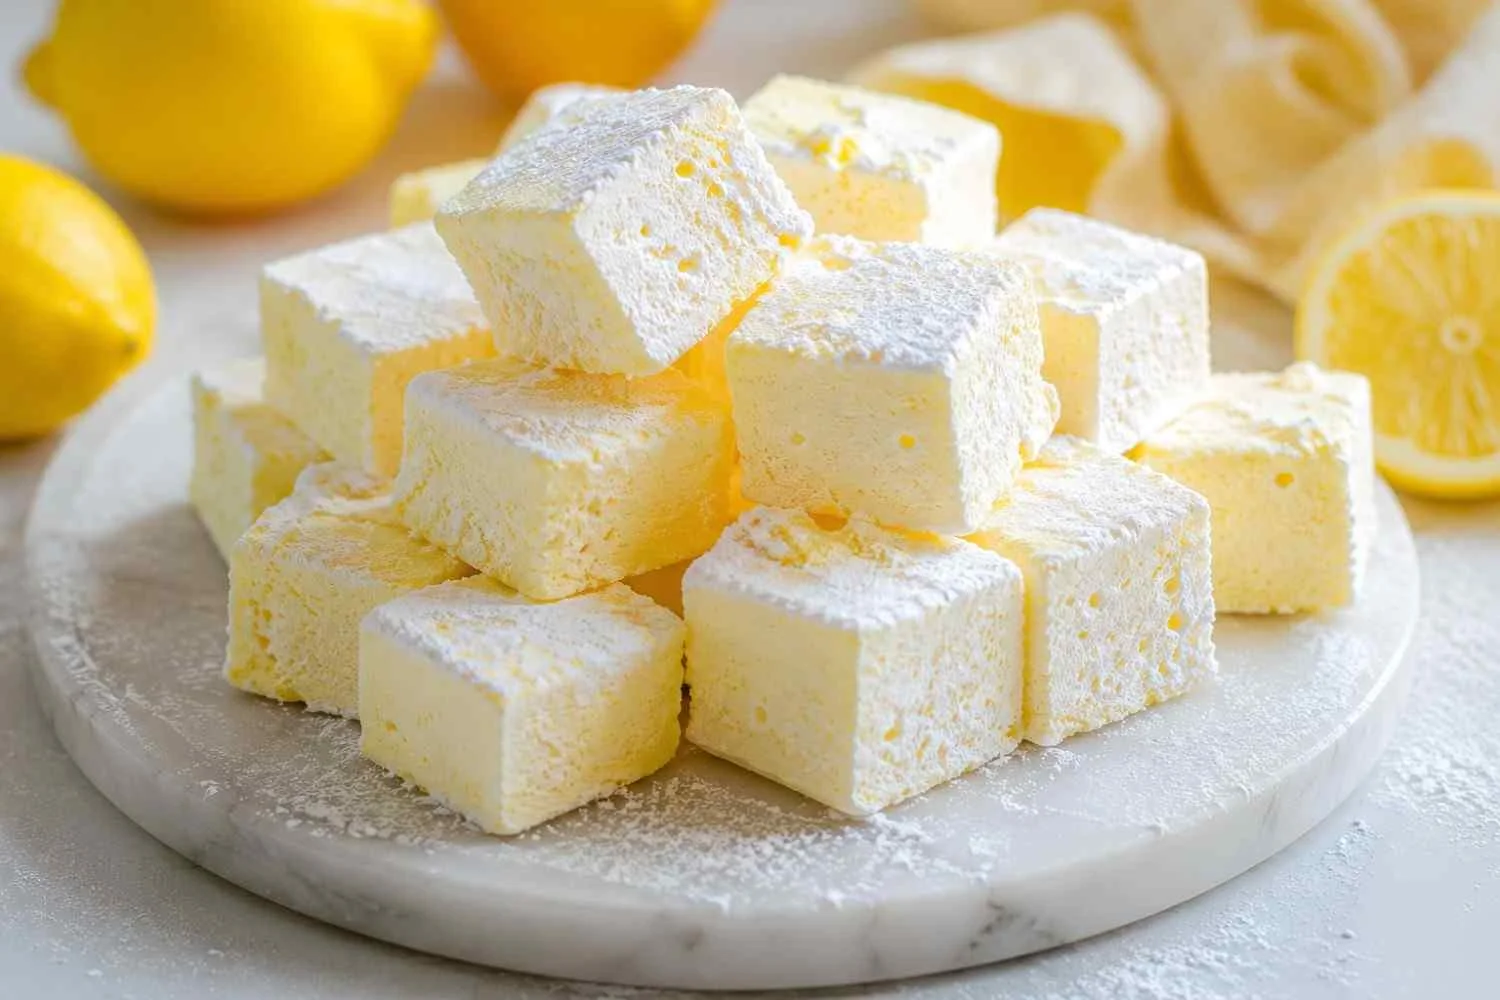
Store-bought marshmallows sit in bags for months, losing moisture and picking up that faint cardboard smell. Homemade ones? Entirely different story. They’re soft, cloud-like, and melt on your tongue and when you add real lemon juice and zest, they become something genuinely special.
Ingredients You Need
To make one 9×13-inch pan (approximately 24–40 marshmallows, depending on cut size), gather the following:
For the marshmallow base:
- 1½ cups granulated sugar
- 1 cup light corn syrup
- ¾ cup cold water, divided
- 3 packets (¾ oz / ~21g) unflavored powdered gelatin
- ¼ cup fresh lemon juice (from 2–3 lemons)
- ½ tsp finely chopped lemon zest
- ¼ tsp kosher salt
- 1 tsp pure vanilla extract
- 1 whole vanilla bean (optional but recommended)
- 3–4 drops yellow food coloring (optional)

For dusting:
- ¼ cup powdered sugar
- ¼ cup cornstarch or tapioca flour
Meyer Lemons vs. Regular Lemons: Which Should You Use?
Meyer lemons are sweeter and more floral than standard lemons, with thinner skin and less bitterness in the zest. Regular lemons are sharper and more acidic. Both work well here.
| Meyer Lemon | Regular Lemon | |
| Flavor | Sweet, floral, mild | Sharp, bright, tart |
| Acidity | Lower | Higher |
| Availability | Seasonal (winter–spring) | Year-round |
| Best for | Delicate, nuanced flavor | Bolder citrus punch |
Use regular lemons if you want a more pronounced lemon flavor. For a softer, more rounded citrus note, go with Meyer lemons when they’re in season.
How Do You Make Lemon Marshmallows Step by Step?
Bloom gelatin in lemon juice and water, cook a sugar-corn syrup mixture to 240°F, combine the two, then whip on high speed for 12–15 minutes until thick and white. Pour into a prepared pan, leave uncovered overnight, then cut and coat in a powdered sugar-cornstarch mixture.

Here’s the full process:
Step 1: Prepare Your Pan and Dusting Mixture
Mix the powdered sugar and cornstarch together in a small bowl this is your anti-stick coating. Line a 9×13-inch baking dish with lightly oiled parchment paper and dust it generously with the mixture. Set the remainder aside for later.
Step 2: Bloom the Gelatin
In your stand mixer bowl, combine the gelatin with ¼ cup cold water and all of the lemon juice. Stir briefly and let sit for at least 5 minutes. The gelatin will absorb the liquid and swell into a spongy mass. Don’t rush this step—under-bloomed gelatin won’t dissolve properly and can leave lumps in the final marshmallow.
Step 3: Cook the Sugar Syrup
Combine the granulated sugar, corn syrup, salt, and remaining ½ cup water in a medium saucepan over medium heat. Stir until the sugar dissolves, then attach a candy thermometer and stop stirring. Increase the heat and cook the syrup until it reaches 240°F (soft-ball stage). Some recipes call for 260°F (hard-ball stage), which produces a firmer, chewier marshmallow—your preference will determine which temperature to target.

Temperature guide:
- 235–240°F → Softer, more pillowy marshmallow
- 255–260°F → Firmer, chewier marshmallow
Step 4: Combine and Whip
Fit your stand mixer with the whisk attachment. Turn it to low speed and slowly pour the hot sugar syrup into the bloomed gelatin in a thin, steady stream pouring it down the side of the bowl helps prevent splashing. This syrup is extremely hot, so move carefully.
Once all the syrup is incorporated, add the lemon zest, vanilla extract, vanilla bean seeds (if using), and food coloring. Gradually increase the speed to high and whip for 12–15 minutes, until the mixture has tripled in volume, turned completely white, and holds a thick, ribbony shape.
Step 5: Set Overnight
Pour the marshmallow mixture into your prepared pan and smooth the top with an offset spatula. Leave it uncovered at room temperature overnight at least 8 hours. Covering it traps moisture and prevents the surface from setting properly.

Step 6: Cut and Coat
Dust a clean cutting board generously with the powdered sugar mixture. Use the parchment paper to lift the marshmallow slab out of the pan and flip it onto the dusted surface. Peel away the paper, dust the top, then use a lightly oiled sharp knife to cut the marshmallow into 1-inch squares or any shape you like. Toss each piece in the dusting mixture to coat all cut edges.
Common Lemon Marshmallow Mistakes
Most problems with homemade marshmallows come down to temperature and timing. Here’s what can go wrong and what to do about it:

| Problem | Likely Cause | Fix |
| Marshmallows won’t set | Sugar didn’t reach correct temp / gelatin not fully bloomed | Use a reliable candy thermometer; bloom gelatin fully |
| Sticky surface | Humid environment or not enough dusting mixture | Add more cornstarch-sugar mix; avoid making on very humid days |
| Grainy texture | Sugar crystallized during cooking | Don’t stir after sugar dissolves; keep sides of pan clean |
| Flat, dense texture | Mixture not whipped long enough | Whip on high for full 12–15 minutes |
| Too sweet, lacks tartness | Not enough lemon | Add ¼ tsp citric acid or increase lemon juice by 1–2 tbsp |
What Makes Homemade Lemon Marshmallows Better Than Store-Bought?
The texture difference alone is reason enough to make your own. Store-bought marshmallows are extruded through machines under pressure, which creates a dense, rubbery structure. Homemade special marshmallows are whipped with air, producing a much lighter, more delicate result.

Adding lemon takes things further. Most commercial lemon-flavored confections use artificial flavoring the kind that tastes vaguely like lemon dish soap. Real lemon juice and zest deliver genuine citrus brightness, with a tartness that balances the sweetness of the sugar syrup.
Here’s a quick comparison:
| Feature | Store-Bought | Homemade Lemon |
| Texture | Dense, rubbery | Light, pillowy |
| Flavor | Artificial or plain | Real citrus, bright |
| Shelf life | Months (preservatives) | Up to 1 week |
| Ingredients | Many additives | 8–10 simple ingredients |
| Customization | None | Fully adjustable |
How Can You Customize a Lemon Marshmallow Recipe?
This is where homemade marshmallows have a clear edge over anything commercial. A few simple adjustments can take the base recipe in completely different directions:
- Lemon meringue style – Add a vanilla bean and vanilla extract to mimic lemon meringue pie flavors
- Extra tart – Stir in ¼ tsp citric acid after whipping for a sour kick. If you enjoy a stronger tangy flavor, you can also try this sour marshmallow treats for an even more pronounced sweet-and-sour taste.
- Lemon lavender – Add ½ tsp dried culinary lavender to the sugar syrup while cooking, then strain before combining
- Lemon blueberry swirl – Swirl 2 tbsp blueberry jam into the marshmallow cream before it sets
- Pink lemonade – Replace yellow food coloring with a small amount of red or pink
How Do You Store Homemade Lemon Marshmallows?
Store cut marshmallows in an airtight container at room temperature for up to one week. In humid conditions, the dusting coating can absorb moisture and become sticky—if this happens, toss the marshmallows in a fresh batch of the powdered sugar-cornstarch mixture before serving.
Refrigeration is not recommended. Cold temperatures introduce condensation, which makes the surface tacky.
Freezing: Marshmallows can be frozen for up to 3 months. Freeze them in a single layer first, then transfer to an airtight bag. Thaw at room temperature for 30 minutes before serving.
Creative Ways to Serve Lemon Marshmallows
Lemon marshmallows are far more versatile than their plain counterparts. A few serving ideas:
- Lemon meringue s’mores – Toast over a flame with graham crackers and white chocolate
- Hot tea floats – Melt two or three into a cup of chamomile or green tea. If you prefer richer flavors, try pairing your drinks with coffee-flavored marshmallows for a café-inspired treat
- Dessert garnish – Top lemon tarts, cheesecakes, or pavlovas
- Gift boxes – Packaged in cellophane bags, they make excellent edible gifts
- Hot cocoa companion – The citrus note pairs surprisingly well with dark chocolate
Final Thoughts
Homemade lemon marshmallows are a simple way to turn everyday pantry ingredients into a light, fluffy treat bursting with fresh citrus flavor. Whether you enjoy them in hot tea, toasted for s’mores, packaged as homemade gifts, or served alongside your favorite desserts, they’re far more flavorful and customizable than anything you’ll find at the store. Once you’ve mastered this recipe, experiment with different citrus varieties or try our peppermint marshmallow treat for a festive twist.