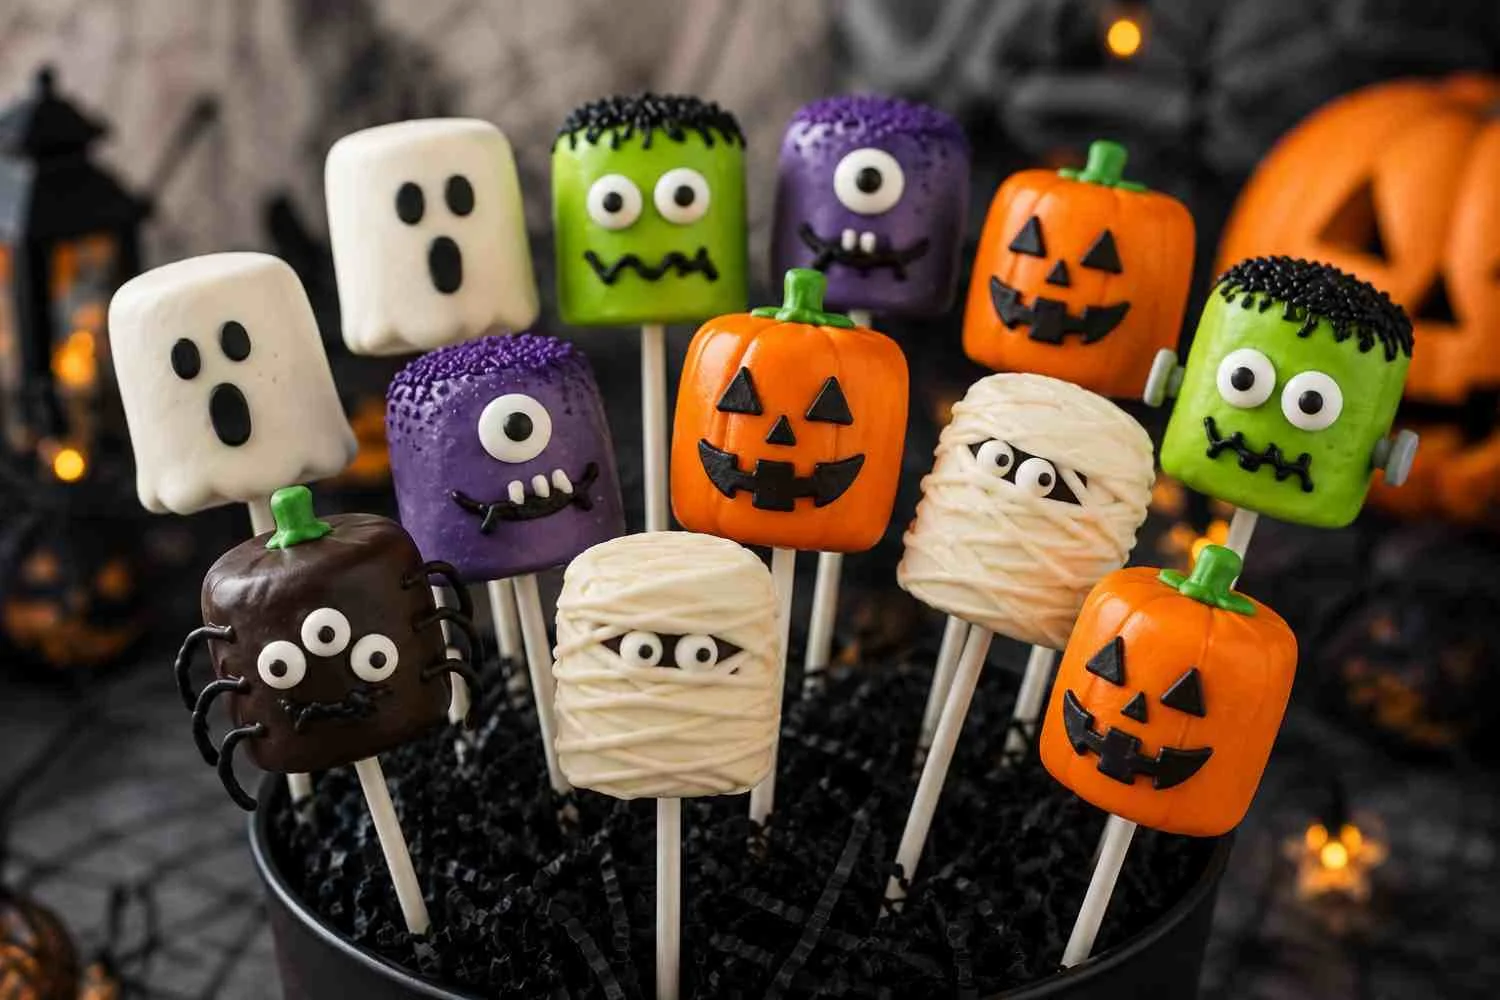
Halloween marshmallow pops are an easy treat with no bake made by placing large marshmallows on sticks and covering with chocolate or candy melts. With a few simple decorations, they can be turned into ghosts, pumpkins, monsters, mummies, or other spooky designs. If you are looking for more creative ways to decorate and serve them, check out these halloween marshmallow ideas for kid friendly decoration and inspiration. You can prepare the basic pops ahead of time and decorate them in different ways to create a fun-looking dessert table.
Halloween Marshmallow Pop Ingredients
| Ingredient | Amount |
| Large marshmallows | 12–16 |
| White chocolate or white candy melts | 8 oz |
| Dark or milk chocolate | 4 oz |
| Halloween sprinkles | As needed |
| Candy eyes | As needed |
| Lollipop sticks | 12–16 |
| Orange candy melts | Optional |
| Black decorating gel | Optional |

Large marshmallows are easier to work with because they provide enough room for faces and other decorations.
You can use chocolate or candy melts for the coating. Candy melts are particularly convenient when you want different Halloween colors such as orange, green, purple, or black.
How to Make Halloween Marshmallow Pops
1. Prepare the Marshmallows
Arrange the marshmallows on a clean work surface.
Insert one lollipop stick into the center of each marshmallow. Push the stick far enough into the marshmallow to hold it securely, but don’t push it completely through the opposite side.
Line a baking sheet or tray with parchment paper. You’ll use this surface to place the decorated pops while the coating sets.

2. Melt the Coating
Melt the white chocolate or candy melts according to the package directions.
If using a microwave, heat the coating in short intervals and stir between each one. This helps distribute the heat and reduces the chance of overheating.
The coating should be smooth and fluid enough to cover the marshmallow easily.
If you’re using different colors, melt each color separately in its own container.

3. Dip the Marshmallows
Hold each marshmallow by the stick and dip it into the melted coating.
Rotate it gently so the surface is covered evenly.
Allow excess coating to drip back into the bowl before placing the marshmallow pop on the parchment.
If some areas aren’t fully covered, use a spoon to add a little more melted coating.

4. Decorate Immediately
Add your decorations while the coating is still soft.
This is the easiest time to attach:
- Candy eyes
- Halloween sprinkles
- Chocolate details
- Small candy decorations
- Colored sugar
For more detailed designs, allow the first coating to firm up slightly before adding another color or layer.

5. Let the Pops Set
Place the decorated marshmallow pops on parchment paper and allow the coating to harden.
You can let them set at room temperature in a cool area or briefly refrigerate them if you need to speed up the process.
Once the coating has completely set, carefully check that the decorations are secure before serving or packaging.

Easy Halloween Designs
Ghost Marshmallow Pops
Dip the marshmallows in white coating.
Add two candy eyes before the coating sets. Use dark chocolate or decorating gel to create a small mouth.
The simple white shape naturally resembles a little ghost.

Pumpkin Marshmallow Pops
Use orange candy melts to cover the marshmallows.
Add black details for the eyes and mouth. A small amount of green decorating gel can be used for a stem.
Monster Pops
Choose green, purple, orange, or another Halloween color.
Add one or more candy eyes in different positions. Use dark chocolate or decorating gel for eyebrows, mouths, or other details.
The less perfect the faces are, the more playful the finished monsters can look.
Mummy Marshmallow Pops
Coat the marshmallows with white chocolate.
Once the coating has started to set, drizzle thin lines of white chocolate across the surface in different directions.
Leave a small area visible for the eyes.

Spider-Inspired Pops
Dip the marshmallows in dark chocolate and add candy eyes.
Use melted chocolate to create thin lines around the sides for a simple spider-inspired appearance.
Halloween Marshmallow Pop Decorating Tips
A smooth coating makes decorating much easier.
Keep these tips in mind:
- Don’t overheat chocolate or candy melts.
- Stir the coating thoroughly after heating.
- Dip marshmallows while the coating is fluid.
- Add decorations before the coating hardens.
- Use parchment paper to prevent sticking.
- Keep decorations in small bowls for easy access.
- Work with a few pops at a time.

If the coating becomes too thick during decorating, gently warm it again according to the product’s instructions.
Don’t make the coating excessively hot. Very hot chocolate can melt or soften the marshmallow surface.
How to Keep the Pops From Falling Apart
The stick should be inserted into the center of the marshmallow rather than close to the edge.
Push it in securely without piercing completely through the other side.
Avoid adding very heavy decorations. Candy eyes, sprinkles, and small chocolate details are light enough for most large marshmallows, while oversized candy pieces can make the pop difficult to hold.
If you’re making particularly large pops, use a sturdy food-safe stick that can support the marshmallow.

How to Serve Halloween Marshmallow Pops
Finished pops can be displayed upright in a cake-pop stand, decorated container, or another food-safe holder.
For individual servings, wrap each pop in a clear food-safe bag and secure it with Halloween-themed ribbon.
They work well for:
- Halloween parties
- Dessert tables
- School celebrations
- Bake sales
- Halloween movie nights
- Kids’ parties
- Homemade treat bags
A mixture of ghost, pumpkin, monster, and mummy designs creates more visual variety than making every pop identical.
Storage
Store decorated marshmallow pops in an airtight container in a cool, dry place.
Humidity can make the coating sticky and affect the texture of the marshmallows, so keep them away from damp areas.
If the particular chocolate or candy coating you’re using has specific storage instructions, follow those instructions.
For the best texture and appearance, avoid making the pops unnecessarily far in advance.
When packaging them individually, make sure the coating has completely hardened before placing them into bags.
Frequently Asked Questions
Can I make Halloween marshmallow pops ahead of time?
Yes. You can prepare them ahead of a Halloween gathering and keep them properly covered in a cool, dry place.
What chocolate is best for marshmallow pops?
White, milk, or dark chocolate can work. Candy melts are also useful because they are available in several Halloween-friendly colors.
Can I use regular marshmallows?
Yes, but large marshmallows are easier to decorate and provide more room for Halloween faces and designs.
Why won’t my chocolate stick to the marshmallow?
The coating may be too thick or the marshmallow surface may not be adequately covered. Make sure the chocolate or candy melts are smooth and fluid before dipping.
How do I make ghost marshmallow pops?
Cover the marshmallows with white chocolate or white candy melts, then add candy eyes and a simple mouth before the coating sets.
Can children help make these?
Yes. Decorating can be a fun Halloween activity. An adult should handle hot melted chocolate or candy melts, especially when younger children are involved.
Can I use homemade marshmallows?
Yes. Homemade marshmallows can work well as long as they are firm enough to hold a stick and support the coating.
How do I stop decorations from falling off?
Add decorations while the coating is still soft. Once the coating has hardened, decorations may not adhere properly.
Final Thoughts
These Halloween Marshmallow Pops are a simple way to create festive Halloween treats without baking. The basic process is straightforward: secure the marshmallows on sticks, dip them in melted chocolate or candy melts, decorate while the coating is soft, and allow everything to set.
The same recipe can produce completely different results depending on the decorations. White coating can become a ghost, orange can become a pumpkin, and colorful coatings can create playful monsters.
For the best results, focus on a smooth coating, secure sticks, lightweight decorations, and proper storage. With those details handled, these marshmallow pops make an easy, colorful treat for Halloween parties, dessert tables, and homemade treat bags.