Colorful, chewy, and incredibly easy to customize, these sprinkle covered marshmallow pops are a fun no-bake treat for birthdays, holidays, school celebrations, baby showers, dessert tables, and everyday sweet cravings. What makes this recipe especially useful for parties is its flexibility. You can change the chocolate, sprinkles, colors, and decorations to match almost any theme.
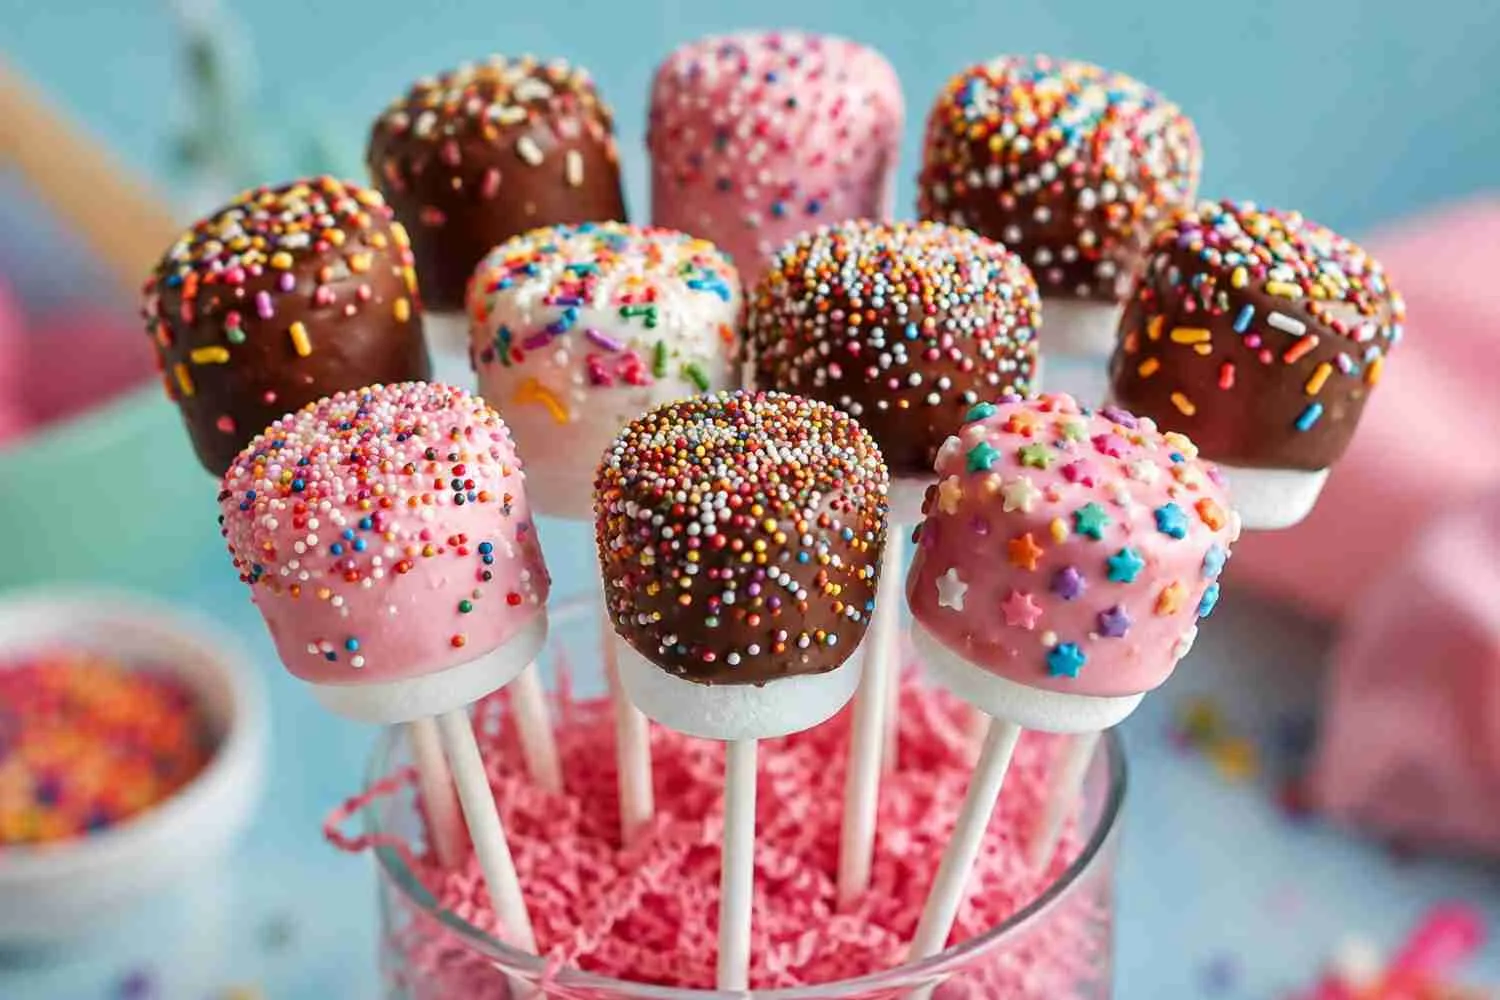
Why You’ll Love These Marshmallow Pops
- No oven required: Perfect when you want a quick dessert without baking.
- Beginner-friendly: There are only a few basic preparation steps.
- Easy to customize: Change the colors and decorations for any occasion.
- Kid-friendly project: Children can help decorate when an adult handles the hot melted coating.
- Party-ready: Make them ahead and arrange them on a platter or dessert table.
- Budget-friendly: A small number of ingredients can produce a generous batch.
These pops are one of several easy no bake marshmallow treats you can prepare when you want a quick party treat
Ingredients
You only need a handful of ingredients to make sprinkle-covered marshmallow pops.
For the Marshmallow Pops
- 12 large marshmallows
- 1½ cups chocolate chips or candy melts
- 12 paper or food-safe lollipop sticks
- ½ cup colorful sprinkles
- 1 teaspoon vegetable shortening or coconut oil, optional

Choosing the Coating
Chocolate chips provide a familiar chocolate flavor, while candy melts are particularly convenient when you want a smooth, colorful coating.
You can use:
- Milk chocolate
- Semi-sweet chocolate
- White chocolate
- Dark chocolate
- Colored candy melts
If using white chocolate, remember that it can be more sensitive to overheating than some candy coatings.

Choosing Sprinkles
Almost any small sprinkle works.
Try:
- Rainbow jimmies
- Nonpareils
- Confetti sprinkles
- Sugar pearls
- Holiday sprinkles
- Metallic sprinkles
- Themed shapes
For the easiest coating, choose sprinkles that aren’t so large or heavy that they slide off the wet chocolate.

Equipment You’ll Need
You don’t need specialized baking equipment.
Gather:
- Microwave-safe bowl
- Microwave or double boiler
- Lollipop sticks
- Parchment paper
- Baking sheet or large plate
- Spoon or spatula
- Small bowl for sprinkles
A deep, narrow bowl is particularly useful because it makes dipping the marshmallows easier while reducing the amount of coating needed.
How to Make Sprinkle Covered Marshmallow Pops
Step 1: Prepare Your Workspace
Line a baking sheet or large plate with parchment paper.
Place your sprinkles in a shallow bowl or dish.
Having everything ready before melting the chocolate is important because the coating will begin setting once the marshmallow is dipped.
If you’re making these for a party, organize the decorations by color or theme before you start.

Step 2: Insert the Sticks
Push one lollipop stick into the center of each marshmallow.
Insert it far enough to hold the marshmallow securely, but don’t push the stick all the way through.
If the marshmallow begins to split, use a slightly smaller insertion angle or replace it with a fresh marshmallow.
Helpful Tip
Very fresh marshmallows can sometimes be soft and difficult to handle.
If your marshmallows feel unusually soft, chilling them briefly can make dipping easier, but they should not become hard or frozen.
Step 3: Melt the Chocolate or Candy Coating
Place the chocolate or candy melts in a completely dry, microwave-safe bowl.
Microwave in short intervals, stirring between each one.
For many microwaves, 15–30 second intervals work better than heating continuously.

Stop heating when the coating is almost completely melted, then stir until the remaining pieces disappear.
Why Short Intervals Matter
Chocolate can burn or seize if overheated.
You don’t need the bowl to feel extremely hot. Gentle heating and frequent stirring are usually the safer approach.
If your coating becomes too thick, stir in a small amount of vegetable shortening or coconut oil if appropriate for the product you’re using.
Don’t add water.
Even a small amount of water can cause melted chocolate to seize and become thick and grainy.
Step 4: Dip the Marshmallows
Hold a marshmallow pop by its stick and dip it into the melted coating.
Rotate gently to cover the desired portion.
Lift it out and allow excess coating to drip back into the bowl.
You don’t need to coat the entire marshmallow if you prefer a partially dipped look.

For a Thicker Coating
Allow the first layer to set slightly, then dip again.
A second coating can create a smoother, more substantial chocolate shell.
Step 5: Add the Sprinkles
This is the most important timing step.
Add sprinkles while the coating is still wet.
Hold the pop over the sprinkle bowl and sprinkle generously.
You can also gently roll the coated marshmallow through the sprinkles, but be careful not to press hard enough to deform the marshmallow.
If you’re using multiple sprinkle colors, decorate one pop at a time so the coating doesn’t set before the decorations are added.

Step 6: Let the Pops Set
Place the finished marshmallow pops upright or lay them carefully on parchment paper.
Allow the coating to firm up at room temperature.
If your kitchen is warm, you can refrigerate them briefly to speed up setting.
Avoid leaving them in the refrigerator unnecessarily long because condensation can develop when chocolate-coated treats move between cold and warm environments.
Once completely set, they’re ready to serve.
How to Get Sprinkles to Stick Better
The trick is simple:
Don’t wait.
Sprinkles stick to melted chocolate because the coating acts as an adhesive while wet.
If the surface has already hardened, the sprinkles won’t attach properly.
For the cleanest result:
- Dip one marshmallow.
- Let excess coating drip away.
- Immediately add sprinkles.
- Place it on parchment.
- Repeat.
If you’re making a large batch, it’s easier to work in small groups rather than dipping all the marshmallows first and decorating them later.

Chocolate vs. Candy Melts
Both work well, but they behave differently.
1: Chocolate
Chocolate offers the best traditional flavor.
Milk chocolate gives a sweet, creamy result.
Semi-sweet chocolate provides more balanced sweetness.
Dark chocolate works well when you want contrast with colorful sprinkles.
White chocolate creates a bright background that makes colorful decorations stand out.
2: Candy Melts
Candy melts are convenient because they’re designed to melt into a coating and come in many colors.
They’re particularly useful for:
- Birthday themes
- Baby showers
- Holiday colors
- School events
- Character-themed parties
- Color-coordinated dessert tables

Which Should You Use?
Choose real chocolate for flavor and candy melts for convenience and color variety.
Best Marshmallows for Pops
Use large, fresh marshmallows.
Mini marshmallows are too small for most traditional marshmallow pops, while oversized specialty marshmallows may be difficult to balance on a stick.
Fresh marshmallows should feel soft and springy rather than hard or stale.
Check the package before using them and avoid marshmallows that have become unusually dry.
Sprinkle Combinations for Every Occasion
One of the best things about this recipe is how easily you can change the appearance.
Birthday Marshmallow Pops
Use rainbow sprinkles, colorful jimmies, or a combination of birthday-themed shapes. For another celebration ready dessert, try these birthday marshmallow based cake ideas for a larger centerpiece.

Baby Shower
Try pastel pink, blue, yellow, green, or neutral sprinkles.
Valentine’s Day
Use pink, red, white, and heart-shaped decorations.
Christmas
Combine red, green, white, and gold.
Holiday
For more festive ideas, explore these holiday marshmallow recipes for treats beyond individual pops.
Halloween
Try orange, black, purple, and themed shapes for a festive Halloween themed marshmallow pop.
Easter
Pastel colors and small sugar decorations work beautifully.
Graduation
Use the graduate’s school colors.

Sports Party
Match the team’s colors.
How to Make Chocolate Marshmallow Pops Look Professional
A few small details can make homemade treats look much more polished.
Use a deep dipping bowl
A narrow bowl gives you more dipping depth without requiring excessive chocolate.
Tap gently
After dipping, lightly tap the stick against the edge of the bowl to remove excess coating.
Don’t shake the marshmallow aggressively.
Keep the chocolate at the right consistency
Chocolate that’s too thick creates a heavy, uneven coating.
Chocolate that’s too hot can melt or soften the marshmallow.
Use coordinated sprinkles
Two or three complementary colors often look more intentional than too many unrelated colors.
Allow enough setting time
Handling the pops before the coating has fully hardened can create fingerprints, smears, and loose decorations.
Common Problems and How to Fix Them
My Chocolate Is Too Thick
The chocolate may not be fully melted, or it may have cooled too much.
Stir thoroughly first.
If necessary, gently warm it again in short intervals.
A small amount of suitable shortening may also help thin some coatings.
My Chocolate Seized
If water or steam gets into melted chocolate, it can seize and become thick and grainy.
Unfortunately, simply adding more heat usually won’t fix it.
For dipping projects, the easiest solution is often to start again with a dry bowl and fresh coating.
The Sprinkles Keep Falling Off
You’re probably waiting too long before decorating.
Add the sprinkles immediately after dipping, while the coating is still wet.
The Marshmallow Slides Down the Stick
The stick may not be inserted deeply enough.
Push it gently farther into the marshmallow, without piercing through the opposite side.
A slightly thicker coating can also provide additional stability.
The Marshmallow Starts Melting
Your coating may be too hot.
Allow it to cool slightly before dipping.
Remember that marshmallows are delicate and don’t need extremely hot chocolate to coat successfully.
My Coating Cracks
A thick coating can sometimes crack as it cools.
Try applying a thinner layer and allowing the pops to set gradually.
Sudden temperature changes can also contribute to cracking.
The Chocolate Looks Dull
Real chocolate can develop a dull or streaky appearance if it isn’t tempered properly or if it’s exposed to temperature changes.
For a simple party treat, the appearance is usually still perfectly acceptable.
If you want a glossy professional finish, use properly tempered chocolate or a coating specifically designed to set with a smooth finish.
How to Store Marshmallow Pops
Store finished pops:
- In an airtight container
- In a cool, dry location
- Away from direct sunlight
- Away from strong odors
- Protected from humidity
Place parchment between layers if necessary.
Don’t stack them if the decorations are delicate or the coating hasn’t completely hardened.
Ways to Customize the Recipe
Once you’ve mastered the basic version, there are plenty of variations.
Chocolate Dipped Marshmallow Pops
Dip only half of the marshmallow and leave the other half exposed.
Double Chocolate Pops
Use a chocolate coating and drizzle with a contrasting chocolate after the first layer sets.
Rainbow Pops
Use white coating and cover with rainbow sprinkles.
Holiday Pops
Match the coating and sprinkles to the season.
Birthday Cake Pops
Use white coating with colorful confetti sprinkles.
Peanut Butter Variation
If appropriate for your guests and allergy situation, add a small peanut-butter drizzle after the coating sets. Always clearly label allergens when serving these at gatherings.
Tips for Making a Large Batch
If you’re preparing marshmallow pops for a birthday party, school event, or dessert table, organization makes a big difference.
Set everything up first
Have your marshmallows, sticks, melted coating, sprinkles, parchment, and storage containers ready before you begin.
Work in batches
Don’t melt all the coating at once if you’re making a very large quantity.
Smaller batches are easier to control.
Keep decorations separated
If you’re using multiple sprinkle combinations, prepare separate bowls.
Create an assembly line
One person can dip, another can decorate, and another can arrange finished pops.
Frequently Asked Questions
Can I use regular chocolate chips for marshmallow pops?
Yes. Chocolate chips can be melted and used as a coating. They may be somewhat thicker than purpose-made candy coating, so gentle heating and thorough stirring are important.
Why won’t my sprinkles stick to the marshmallows?
The chocolate coating probably started setting before you added the sprinkles. Decorate each marshmallow immediately after dipping.
Can I use white chocolate?
Yes. White chocolate creates an excellent background for colorful sprinkles. Melt it gently because white chocolate can scorch more easily than some other chocolate products.
Can I make marshmallow pops without a microwave?
Yes. You can melt the coating gently using a double boiler. Keep water and steam away from the chocolate.
How far in advance can I make marshmallow pops?
They can generally be prepared ahead of a party and stored in a cool, dry place. For best quality, protect them from heat, humidity, and direct sunlight.
Can I refrigerate marshmallow pops?
You can refrigerate them briefly if necessary, particularly in a warm environment, but refrigeration can introduce condensation when the treats are brought back to room temperature. A cool, dry room is often preferable for finished chocolate-coated pops.
How do I stop marshmallows from sliding off the sticks?
Insert the stick securely into the center of the marshmallow and avoid making the coating excessively heavy. Allow excess chocolate to drip back into the bowl before decorating.
What kind of sticks should I use?
Use food-safe paper lollipop sticks or another stick specifically designed for food use. Avoid improvised materials that may splinter, break, or contain unsafe coatings.
Are marshmallow pops safe for toddlers?
The ingredients may be suitable depending on the child’s dietary needs, but the stick itself can present an injury hazard. Young children should be closely supervised, and parents or caregivers should decide whether to remove the stick before serving.
Can I freeze marshmallow pops?
Freezing isn’t usually necessary. Moisture and condensation can affect the coating and decorations, so storing them in a cool, dry place is generally preferable for maintaining texture and appearance.
How can I make them less sweet?
Use dark or semi-sweet chocolate instead of candy melts and choose less-sweet decorations. Keep in mind that marshmallows themselves are naturally sweet.
Can I use homemade marshmallows?
Yes, although homemade marshmallows may have a different texture and moisture content. Make sure they are firm enough to support the stick and coating.
Final Thoughts
These sprinkle-covered marshmallow pops prove that a fun party dessert doesn’t need to be complicated.
With just marshmallows, chocolate or candy coating, sticks, and your favorite sprinkles, you can create a colorful treat that looks festive with very little effort.
The most important techniques are simple:
Melt gently. Dip carefully. Decorate immediately. Let the coating set completely.
From rainbow birthday treats to elegant holiday desserts, you can change the colors and decorations to fit almost any occasion.
And because the recipe is so easy to customize, it’s also a great project to make with children—with adults handling the hot coating and younger children helping with the decorations.
For the best results, use fresh marshmallows, keep moisture away from your chocolate, work on parchment, and store the finished pops somewhere cool and dry.
A few simple ingredients, a handful of sprinkles, and a little creativity are all you need to turn ordinary marshmallows into a party-ready dessert.