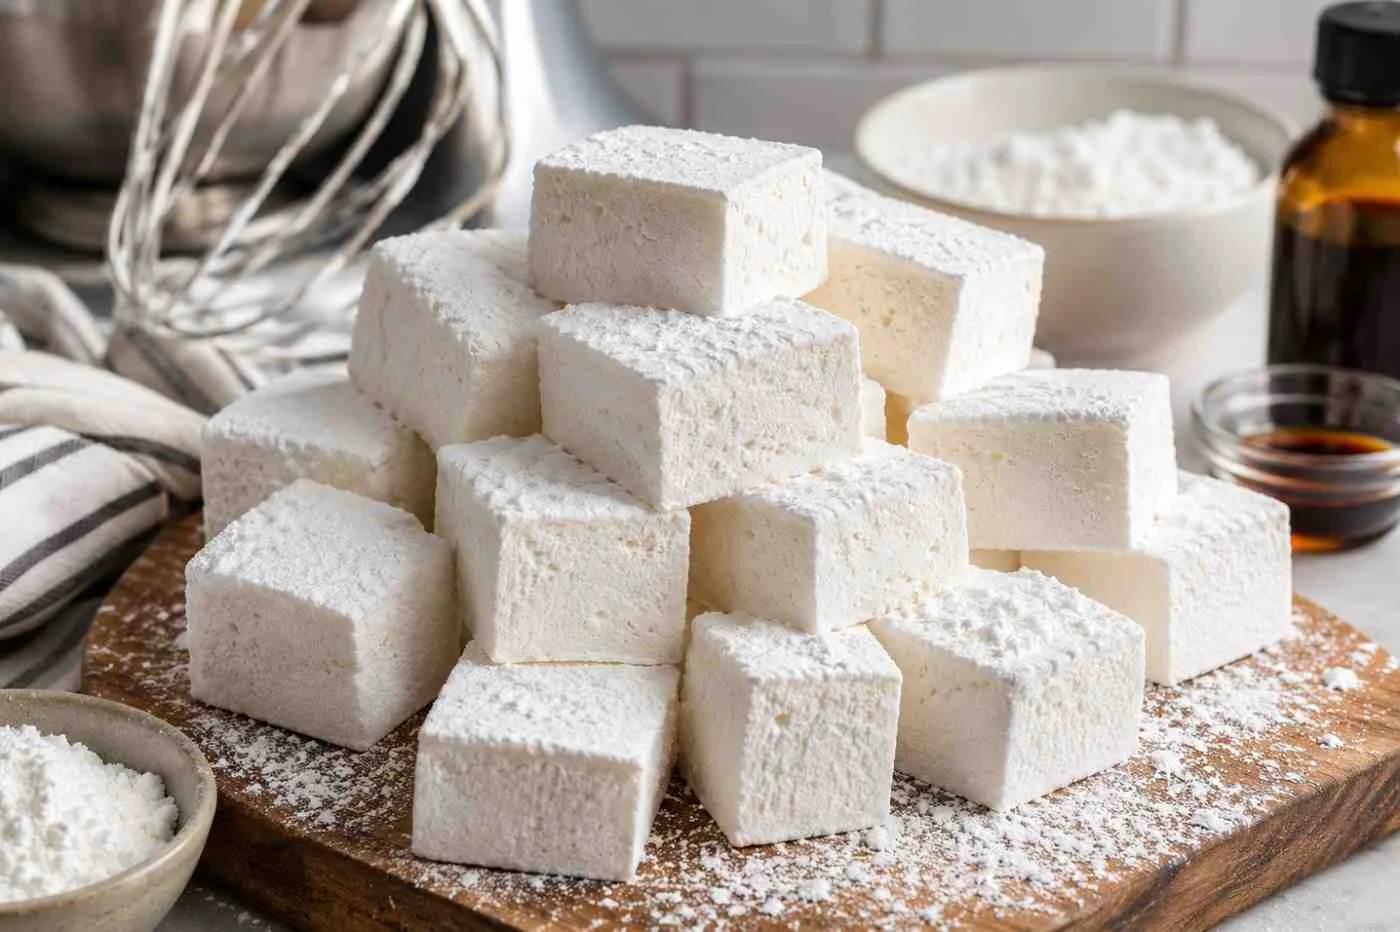
If you’re looking for an old fashioned marshmallow recipe, this classic version delivers the light, pillowy texture and rich vanilla flavor that homemade marshmallows are known for. Made with simple pantry staples like gelatin, sugar, corn syrup, and vanilla, these marshmallows are soft, airy, and far better than store-bought varieties. Whether you’re making them for hot chocolate, s’mores, homemade gifts, or everyday snacking, this traditional recipe is easy to follow and produces consistent results every time.
Recipe At a Glance
Yield: About 36 marshmallows
Prep Time: 25 minutes
Cook Time: 15 minutes
Setting Time: 6–8 hours (or overnight)
Total Time: About 8½ hours
Ingredients
Marshmallow Base
- 3 packets (21g) unflavored gelatin
- ½ cup cold water (for blooming)
- 1½ cups granulated sugar
- 1 cup light corn syrup
- ½ cup water
- ¼ teaspoon fine salt
- 2 teaspoons pure vanilla extract

For Dusting
- ½ cup powdered sugar
- ½ cup cornstarch
Why These Ingredients Matter
Unflavored Gelatin
Gelatin gives marshmallows their signature soft, springy texture. It traps tiny air bubbles during whipping, creating the light and fluffy consistency that defines homemade marshmallows.
Granulated Sugar
Sugar provides sweetness while also forming the structure of the marshmallow. When cooked to the correct temperature, it creates a stable syrup that sets beautifully after whipping.

Light Corn Syrup
Corn syrup helps prevent sugar crystals from forming during cooking, giving the marshmallows a smooth texture instead of a grainy one.
Vanilla Extract
Vanilla is the classic flavor found in traditional marshmallows. Using pure vanilla extract creates a richer, more authentic taste than imitation vanilla for detailed version try our rich vanilla marshmallow recipes for an even richer vanilla experience.
Salt
A small amount of salt balances the sweetness and enhances the vanilla flavor without making the marshmallows taste salty.
Powdered Sugar and Cornstarch
This coating keeps the marshmallows from sticking together and makes them easier to cut and handle.
Kitchen Equipment
You’ll need:

- Stand mixer with whisk attachment
- Candy thermometer
- Heavy-bottomed saucepan
- 9×13-inch baking pan
- Parchment paper
- Rubber spatula
- Sharp knife or pizza cutter
- Mixing bowls
- Measuring cups and spoons
How to Make Old Fashioned Marshmallows
Step 1: Set Up Pan
Lightly grease a 9×13-inch baking pan and line it with parchment paper, leaving enough overhang to lift the marshmallows out later. Grease the parchment as well, then dust the pan with a mixture of powdered sugar and cornstarch.
Step 2: Dissolve the Gelatin Base

Pour ½ cup of cold water into the bowl of your stand mixer. Sprinkle the gelatin evenly over the surface and let it sit for about 10 minutes. The gelatin will absorb the water and become thick and sponge-like.
Step 3: Cook the Sugar Syrup
In a heavy saucepan, combine the granulated sugar, corn syrup, remaining water, and salt. Heat over medium heat, stirring until the sugar dissolves completely. Once the mixture begins to boil, stop stirring and cook until it reaches 240°F (115°C) on a candy thermometer.
Step 4: Whip the Mixture
Turn the mixer to low speed and slowly pour the hot sugar syrup into the hydrated gelatin. Once all the syrup has been added, increase the mixer to high speed and whip for 10 to 12 minutes. The mixture should become thick, glossy, and nearly triple in volume.

Step 5: Add the Vanilla
Reduce the mixer speed to low and add the vanilla extract. Mix for about 30 seconds, just until incorporated. Avoid overmixing once the vanilla has been added.
Step 6: Spread the Mixture
Immediately pour the marshmallow mixture into the prepared pan. Using a lightly greased offset spatula or rubber spatula, spread it evenly into the corners. Work quickly because the mixture begins to set as it cools.
Step 7: Leave It to Set
Place the pan in a cool, dry area and let the marshmallows set uncovered for 6 to 8 hours, or overnight for the best texture. Avoid refrigerating them, as condensation can make the surface sticky.
Step 8: Cuting
Mix the remaining powdered sugar and cornstarch in a shallow bowl. Dust the top of the marshmallow slab, then lift it out of the pan using the parchment paper. Peel away the paper and cut the marshmallows into squares with a lightly greased knife or pizza cutter. Toss each piece in the coating until all sides are covered.
What Gives Old Fashioned Marshmallows Their Classic Texture?
Traditional marshmallows are known for their soft, airy texture because of the way hot sugar syrup and gelatin work together. For another classic confection with a similar old-fashioned character, try our classic marshmallow nougat recipe. The gelatin traps thousands of tiny air bubbles as the mixture is whipped, while the cooked sugar syrup creates a stable structure that holds those air pockets in place after the marshmallows set.
Unlike many commercial marshmallows, homemade versions contain fewer ingredients and no unnecessary preservatives, resulting in a lighter texture and richer vanilla flavor.
Helpful Tips for the Best Homemade Marshmallows

- Use a candy thermometer to cook the syrup accurately to 240°F (115°C).
- Prepare your pan before you begin whipping so the mixture can be transferred immediately.
- Whip the marshmallow mixture for the full 10 to 12 minutes to create maximum volume.
- Grease your knife lightly between cuts for clean, even squares.
- Allow the marshmallows to set overnight if possible for the best texture.
- Store them in a cool, dry place rather than the refrigerator.
- Use pure vanilla extract for the richest old-fashioned flavor.
- Dust generously with powdered sugar and cornstarch to prevent sticking.
Traditional Flavor Variations
Honey Vanilla Marshmallows
Replace a small portion of the corn syrup with honey for a delicate floral sweetness that pairs beautifully with vanilla.
Maple Marshmallows
Add pure maple syrup in place of part of the corn syrup for a warm, rich flavor that’s especially popular during the fall season.
Chocolate-Dipped Marshmallows
After cutting, dip half of each marshmallow in melted dark or milk chocolate and allow the coating to harden before serving. It’s an easy way to create chocolate coated marshmallows with a richer flavor.
Peppermint Marshmallows
Add a small amount of peppermint extract along with the vanilla to create a refreshing holiday treat.
Toasted Coconut Marshmallows
Roll freshly cut marshmallows in toasted shredded coconut after coating them with powdered sugar for extra texture and flavor. Toasted coconut gives soft coconut marshmallows a delicious tropical twist.
Cinnamon Vanilla Marshmallows
Mix a pinch of ground cinnamon into the marshmallow base for a subtle warmth that pairs perfectly with hot chocolate.
Common Problems and Easy Fixes
Marshmallows Didn’t Set
This usually means the sugar syrup didn’t reach the proper temperature or the gelatin wasn’t fully hydrated. Always bloom the gelatin completely and cook the syrup to 240°F (115°C).
Marshmallows Are Too Sticky
Homemade marshmallows naturally have a soft exterior. Toss them generously in the powdered sugar and cornstarch mixture, and store them in an airtight container.
Grainy Texture
Sugar crystals can form if the syrup is stirred after it begins boiling. Once the mixture reaches a boil, allow it to cook undisturbed until it reaches the correct temperature.
Dense Instead of Fluffy
Underwhipping is one of the most common mistakes. Continue whipping until the mixture becomes thick, glossy, and holds its shape before transferring it to the pan.
Marshmallows Stick to the Knife
Lightly grease the knife or pizza cutter before every few cuts to keep the edges neat and prevent sticking.
Best Ways to Enjoy Old Fashioned Marshmallows
One of the best things about this old fashioned marshmallow recipe is how versatile it is. These homemade marshmallows are delicious on their own, but they also work beautifully in drinks, desserts, and baked treats.
Add Them to Hot Chocolate
Drop one or two marshmallows into a mug of hot chocolate and watch them slowly melt into a creamy topping. Their rich vanilla flavor makes every sip more indulgent.
Make Classic S’mores
Toast the marshmallows over a campfire or gas burner until golden brown, then sandwich them between graham crackers and chocolate for traditional homemade s’mores.
Pair with Coffee or Tea
Serve marshmallows alongside freshly brewed coffee, espresso, or black tea for a simple afternoon treat. They also make an elegant addition to dessert platters.
Decorate Homemade Desserts
Use mini marshmallows or cut them into decorative shapes to top cupcakes, brownies, cookies, cheesecakes, or celebration cakes.
Give as Homemade Gifts
Package the marshmallows in decorative bags, glass jars, or gift boxes for birthdays, holidays, or special occasions. They’re easy to make ahead and always appreciated.
Frequently Asked Questions
Why Are They Called Old Fashioned Marshmallows?
Old fashioned marshmallows refer to the traditional homemade method of preparing marshmallows from scratch using gelatin, cooked sugar syrup, and vanilla. They have a softer texture and fresher flavor than most commercially produced marshmallows.
Can I Make Them Without a Stand Mixer?
Yes. A powerful hand mixer can be used, although whipping the mixture will take slightly longer. A stand mixer is recommended because it handles the thick marshmallow mixture more easily.
Can I Cut Marshmallows into Different Shapes?
Absolutely. Once the marshmallows have fully set, use cookie cutters dusted with powdered sugar to create festive shapes for holidays, birthdays, or special occasions.
Final Thoughts
This old fashioned marshmallow recipe proves that homemade marshmallows are surprisingly simple to make and well worth the effort. Their light, fluffy texture and classic vanilla flavor make them a timeless treat for everything from hot chocolate and s’mores to homemade gifts and dessert platters. Once you’ve mastered this traditional recipe, experiment with other homemade favorites like superb maple marshmallows to enjoy a different flavor while using the same classic technique.