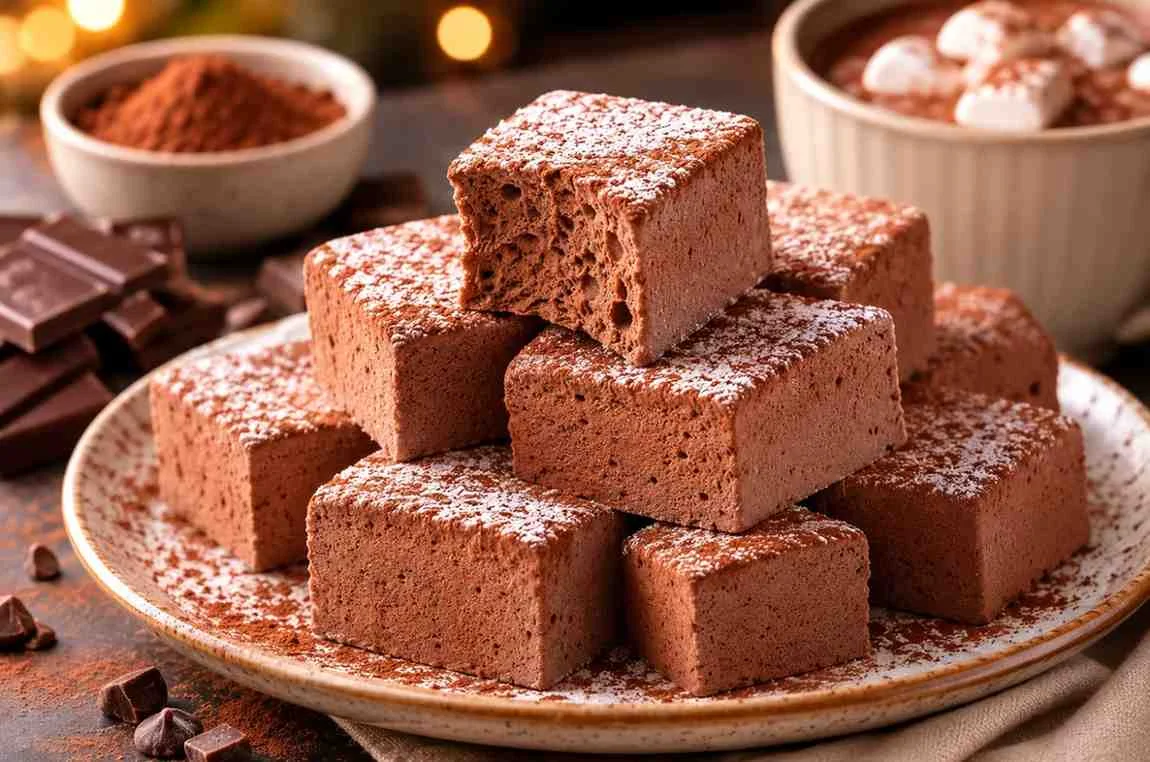
If you are searching for the best chocolate marshmallow recipe, you have come to the right place. Homemade chocolate marshmallows are incredibly soft, fluffy, and rich in chocolate flavor, making them a delicious upgrade from store-bought marshmallows. Whether you are adding them to a mug of hot chocolate, making gourmet s’mores, decorating desserts, or creating edible holiday gifts, these homemade treats deliver a light, melt in your mouth texture that’s hard to beat. Prefer a fruity marshmallow instead of chocolate? Our sweet strawberry marshmallow recipe is a delicious alternative, featuring fresh strawberry flavor and the same light, pillowy texture that’s perfect for snacking, gifting, or adding to desserts.
Recipe Overview
- Yield: 36 marshmallows
- Prep Time: 20 minutes
- Cook Time: 15 minutes
- Setting Time: 6–8 hours
- Total Time: About 8½ hours
- Difficulty: Intermediate

Chocolate Marshmallow Ingredients
For the Marshmallows
- 3 packets (21g) unflavored powdered gelatin
- ½ cup cold water (for blooming the gelatin)
- 2 cups granulated sugar
- ¾ cup light corn syrup
- ½ cup water
- ¼ teaspoon fine sea salt
- ¼ cup Dutch-process cocoa powder
- 4 ounces (115g) dark chocolate, melted
- 2 teaspoons pure vanilla extract
For the Coating
- ½ cup powdered sugar
- ¼ cup cocoa powder
- ¼ cup cornstarch
Ingredient Notes
- Unflavored gelatin gives marshmallows their signature soft, springy texture. Be sure to use powdered gelatin rather than flavored gelatin.
- Dutch-process cocoa powder creates a darker color and smoother chocolate flavor than natural cocoa powder.
- Dark chocolate adds richness and depth without making the marshmallows overly sweet. Chocolate containing 60–70% cocoa works best.
- Corn syrup helps prevent sugar crystallization, producing marshmallows that stay soft and fluffy.
- Vanilla extract enhances the chocolate flavor and balances the sweetness.

Equipment Needed
Having the right equipment makes the process much easier and helps ensure consistent results.
- Stand mixer (recommended) or a powerful hand mixer
- Heavy-bottom saucepan
- Candy thermometer
- 8×8-inch baking pan
- Silicone spatula
- Fine mesh sieve
- Offset spatula (optional)
- Measuring cups and spoons
Tip: A candy thermometer is one of the most important tools for this recipe. Cooking the sugar syrup to exactly 240°F (116°C) is essential for marshmallows that set properly while remaining soft and fluffy.
How to Make Chocolate Marshmallows
1: Prepare the Gelatin Base
Pour the ½ cup of cold water into the bowl of your stand mixer. Sprinkle the unflavored gelatin evenly over the water without stirring. Let it rest for 10 minutes.
During this time, the gelatin absorbs the water and becomes thick and sponge-like. Properly blooming the gelatin ensures it dissolves evenly once the hot sugar syrup is added, resulting in smooth, airy marshmallows.
How to know it’s ready: The gelatin should appear firm and wrinkled with no dry powder remaining on the surface.

2: Prepare the Cocoa Mixture
While the gelatin blooms, melt the dark chocolate using a microwave or a double boiler until smooth. Stir the cocoa powder into the melted chocolate, then mix in the vanilla extract until fully combined.
Preparing the chocolate mixture ahead of time makes it easier to incorporate evenly into the whipped marshmallow base later. It also helps prevent lumps of dry cocoa powder, ensuring a rich chocolate flavor throughout every bite.
Set the chocolate mixture aside, keeping it slightly warm so it stays smooth and easy to fold into the marshmallow mixture.

3: Heat the Sugar Mixture
In a heavy bottom saucepan, combine the granulated sugar, corn syrup, water, and salt. Place the pan over medium-high heat and stir just until the sugar dissolves. Once the mixture begins to boil, stop stirring and allow it to cook undisturbed until it reaches 240°F (116°C) on a candy thermometer.
Tip: If sugar crystals form on the sides of the pan, brush them down with a pastry brush dipped in water.
4: Whip Until Fluffy
Turn the mixer to low speed and slowly pour the hot sugar syrup down the side of the bowl into the bloomed gelatin. Once all the syrup has been added, gradually increase the mixer to high speed.
Whip the mixture for 10–12 minutes, or until it becomes thick, glossy, and nearly triples in volume. This step incorporates air into the mixture, creating the signature light and fluffy marshmallow texture.
You’ll know it’s ready when: The mixture forms thick ribbons that slowly disappear back into the bowl.

5: Fold in the Chocolate
Reduce the mixer to low speed and gradually add the prepared chocolate mixture. Continue mixing just until the chocolate is fully incorporated and the marshmallow mixture has an even chocolate color.
Avoid overmixing at this stage, as it can reduce the amount of air in the marshmallows and affect their texture. If you enjoy experimenting with marshmallow flavors, try our simple coconut marshmallow recipe, which uses coconut extract and shredded coconut to create a tropical variation with the same light, fluffy texture
6: Pour into the Pan
Immediately transfer the marshmallow mixture into the prepared baking pan. Use a lightly greased silicone or offset spatula to spread it evenly into the corners and smooth the surface.
Dust the top generously with the prepared coating mixture to prevent sticking while the marshmallows set.
Because the mixture begins to firm up quickly, it’s best to work without delay.
7: Let It Set
Leave the marshmallows at room temperature for 6–8 hours, or preferably overnight. This resting time allows the gelatin to fully set and gives the marshmallows their soft, springy texture.
Avoid refrigerating the marshmallows, as moisture can make them sticky.
8: Cut and Coat
Once fully set, loosen the edges and lift the marshmallow slab from the pan. Lightly oil a sharp knife or pizza cutter before slicing into squares.
Coat each marshmallow on all sides with the remaining cocoa, powdered sugar, and cornstarch mixture. This prevents sticking and gives the marshmallows a smooth, professional finish.
Choosing the Best Chocolate

The chocolate you choose has a big impact on the flavor, color, and texture of your homemade marshmallows. Using quality ingredients will give you richer, more balanced results.
Dutch-Process vs. Natural Cocoa
Dutch-process cocoa powder has been treated to reduce acidity, giving it a smoother, darker, and less bitter flavor. It’s the preferred choice for chocolate marshmallows because it blends easily and creates a rich chocolate taste.
Natural cocoa powder has a stronger, slightly tangy flavor and a lighter color. It can be used if that’s what you have, but the finished marshmallows won’t be quite as rich or dark.
Cocoa Powder vs. Melted Chocolate
Cocoa powder delivers concentrated chocolate flavor without adding extra fat, while melted chocolate contributes richness, creaminess, and a smoother mouthfeel.
Using both creates the perfect balance of deep chocolate flavor and light, fluffy texture, making the marshmallows taste more luxurious than recipes that rely on just one.
Dark Chocolate vs. Milk Chocolate
Dark chocolate (60–70% cocoa) provides the best flavor balance. It adds richness without making the marshmallows overly sweet.
Milk chocolate can be substituted if you prefer a sweeter treat, but it produces a milder chocolate flavor and a softer color.
Best Chocolate Brands for Baking
For the best results, choose high-quality baking chocolate from trusted brands such as:
- Ghirardelli
- Guittard
- Valrhona
- Callebaut
- Lindt Excellence
- Baker’s Chocolate
Chocolate bars generally melt more smoothly than chocolate chips, making them the better choice for homemade marshmallows.
Conclusion
Making homemade chocolate marshmallows is easier than it may seem, and the results are well worth the effort. With the right ingredients, proper techniques, and a little patience, you’ll create marshmallows that are soft, fluffy, and full of rich chocolate flavor. Whether you’re adding them to hot chocolate, making gourmet s’mores, serving them with desserts, or packaging them as homemade gifts, these marshmallows are sure to impress.