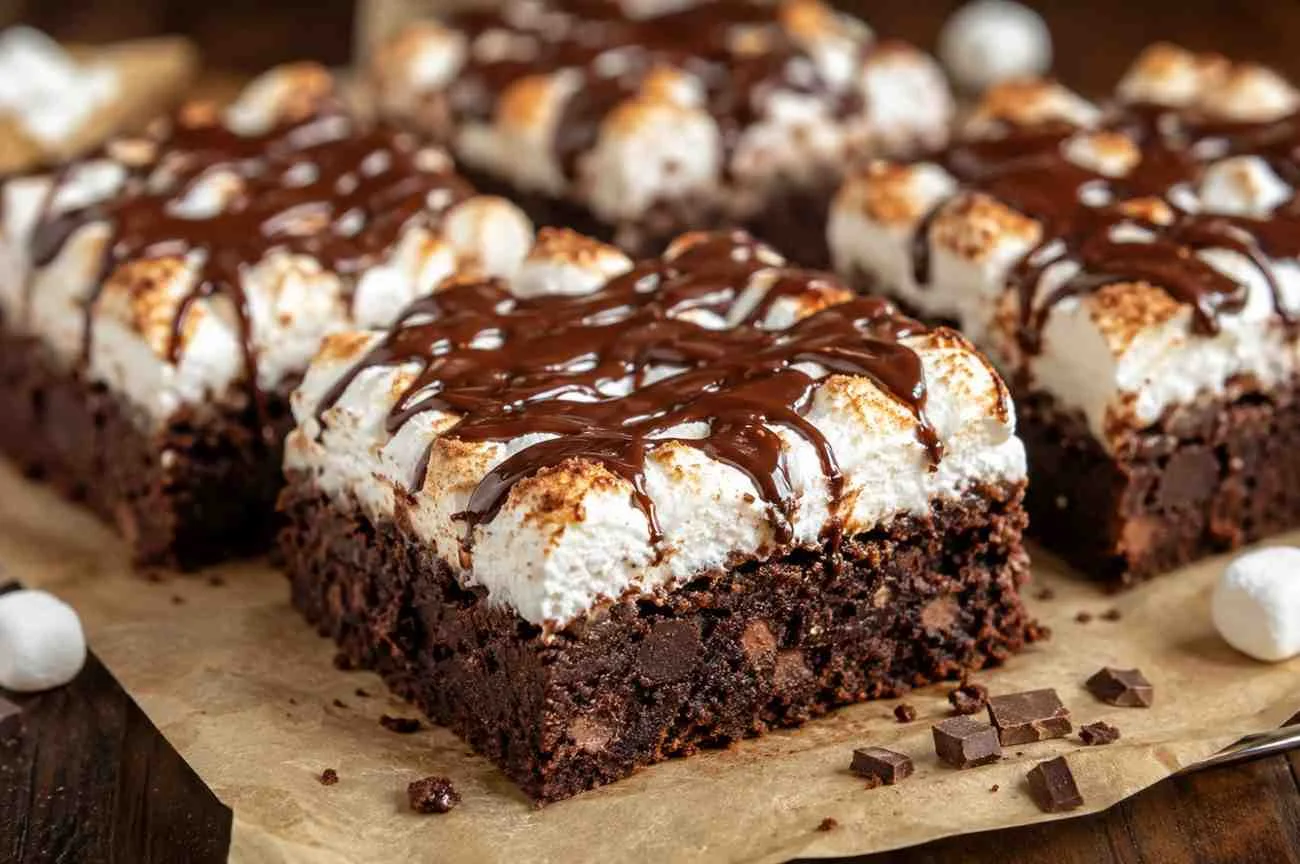
These marshmallow brownies combine a rich, chocolatey brownie base with a soft layer of melted marshmallows and a smooth chocolate topping. The contrast between the dense brownie and fluffy marshmallow makes every bite more interesting than a standard brownie. The recipe also gives you plenty of room to add chocolate chips, nuts, peanut butter, or a light sprinkle of flaky salt. If you’re building a dessert table, mexican style marshmallow cookies are another fun way to combine chocolate and marshmallow flavors.
Recipe at a Glance
| Recipe Detail | Information |
| Prep Time | 15 minutes |
| Bake Time | 25–30 minutes |
| Cooling Time | 30 minutes |
| Total Time | About 1 hour 15 minutes |
| Yield | 16 brownies |
| Servings | 16 |
| Difficulty | Easy |
| Course | Dessert |
Ingredients for the Brownies
Brownie Base
- ½ cup unsalted butter, melted
- 1 cup granulated sugar
- 2 large eggs
- 1 teaspoon vanilla extract
- ¾ cup all-purpose flour
- ½ cup unsweetened cocoa powder
- ¼ teaspoon salt
- ½ cup chocolate chips, optional
Marshmallow Topping
- 3 cups mini marshmallows
- ½ cup chocolate frosting or chocolate glaze, optional
The brownie batter is intentionally simple. Melted butter provides richness, cocoa supplies the chocolate flavor, and the eggs give the brownies enough structure to support the soft marshmallow layer.
Mini marshmallows are convenient because they soften quickly and create a relatively even topping without requiring you to cut large marshmallows into pieces.

Making the Brownie Base
Prepare the Baking Pan
Preheat the oven to 350°F (175°C).
Line an 8-inch square baking pan with parchment paper, leaving some overhang on two sides. Lightly grease the exposed sides of the pan.
The parchment makes it much easier to lift the cooled brownies out later, which is particularly useful because the marshmallow topping can be sticky.
Combine the Melted Butter and Sugar
Add the melted butter and sugar to a mixing bowl. Whisk until the mixture is evenly combined.
The butter should be melted but not extremely hot. If it has just come off the stove, allow it to cool briefly before adding the eggs.

Add the Eggs and Vanilla
Whisk in the eggs one at a time, followed by the vanilla extract.
Mix until the batter looks smooth and slightly glossy. There’s no need to whip the eggs for several minutes because this recipe is designed to produce a dense, chocolatey brownie rather than a light cake-like crumb.
Mix the Dry Ingredients
In a separate bowl, whisk together the flour, cocoa powder, and salt.
Breaking up cocoa powder before it goes into the wet ingredients helps prevent dry pockets from remaining in the finished batter.

Bring the Batter Together
Add the dry ingredients to the butter mixture.
Fold with a spatula until you no longer see streaks of flour. If you’re using chocolate chips, fold them in at the end.
Avoid excessive mixing once the flour has been incorporated. Overworking the batter can make the brownies less tender.
Bake Until Just Set
Spread the batter evenly in the prepared pan.
Bake for approximately 25–30 minutes. The edges should look set while the center should still have a little softness.
A toothpick inserted into the brownie portion should come out with moist crumbs rather than completely clean. That’s a useful sign that the brownies haven’t been baked until dry.

Adding the Marshmallow Layer
The marshmallow topping is added after the brownie base has mostly baked.
Remove the pan from the oven when the brownies are nearly finished. Immediately scatter the mini marshmallows over the surface in an even layer.
Return the pan to the oven for approximately 2–4 minutes, watching closely.
The marshmallows should become soft, puffy, and lightly golden in spots. They don’t need to disappear into the brownie.
Because marshmallows can brown quickly, keep an eye on them during these final minutes. If your oven’s top heat is particularly strong, the topping may need less time.
Remove the brownies as soon as the marshmallows reach the texture you want.

Finishing the Chocolate Topping
If you’re using chocolate frosting or glaze, allow the brownies to cool for several minutes first.
Spread the chocolate topping gently over the marshmallow layer. Don’t press down heavily because the softened marshmallows can move underneath the frosting.
For a more decorative finish, drizzle melted chocolate across the surface instead of covering the entire top.
A small amount of flaky salt can also provide a pleasant contrast to the sweet chocolate and marshmallow.
Getting Fudgy Brownies Instead of Dry Ones
The brownie texture depends as much on technique as ingredients.

Don’t Overmix
Once the flour disappears, stop mixing. Extended mixing can develop gluten and make the brownies firmer.
Measure Flour Carefully
Too much flour can quickly turn a fudgy brownie into a cakier, drier one. If possible, use a kitchen scale for the most consistent measurement.
Don’t Overbake
This is particularly important with brownies. The center should still look slightly soft when the pan comes out of the oven because the residual heat continues cooking the brownie.
Use the Correct Pan Size
A smaller or larger pan changes the thickness of the batter and therefore the baking time. If you change the pan size, begin checking the brownies earlier rather than relying strictly on the original baking time.

Cool Before Cutting
The brownie layer becomes firmer as it cools, while the marshmallow topping becomes easier to cut. Trying to slice the brownies immediately can result in a messy topping and soft centers.
Cutting and Serving
Allow the brownies to cool completely in the pan before lifting them out using the parchment overhang.
For cleaner cuts, use a sharp knife and wipe the blade between slices. If the marshmallow sticks to the knife, lightly grease the blade before making the next cut.
Sixteen smaller squares are convenient for dessert platters, while larger pieces work well for individual servings.
These brownies taste good at room temperature, when the brownie base has a firm but tender texture and the marshmallow remains soft.
Easy Variations

Chocolate Chip Marshmallow Brownies
Fold semi-sweet or dark chocolate chips into the brownie batter before baking. The extra chocolate creates pockets of melted richness beneath the marshmallow topping.
Peanut Butter Marshmallow Brownies
Add small spoonfuls of smooth peanut butter over the brownie batter and gently swirl before baking. The nutty flavor pairs naturally with chocolate and marshmallow.
Nut-Topped Brownies
Add chopped walnuts or pecans to the brownie batter. Toasted nuts provide a useful crunchy contrast to the soft topping.

Salted Chocolate Marshmallow Brownies
Finish the chocolate topping with a small pinch of flaky salt. The salt helps balance the sweetness and gives the brownies a more pronounced chocolate flavor.
Common Problems and Fixes
Why Are My Brownies Dry?
The most common causes are overbaking or using too much flour. Start checking the brownies near the lower end of the recommended baking time and look for moist crumbs rather than a completely clean toothpick.
Why Did the Marshmallows Melt Completely?
The marshmallows may have stayed in the oven too long or been exposed to particularly strong top heat. They only need a few minutes to soften and lightly brown.
Why Is the Topping Too Sticky?
Marshmallows naturally remain somewhat sticky when softened. Allowing the brownies to cool completely helps the topping firm. A thin layer of chocolate glaze can also make the surface easier to handle.
Why Are the Brownies Difficult to Cut?
Cutting while the brownies are still warm can cause the marshmallow layer to drag across the surface. Let the brownies cool fully and use a sharp, lightly greased knife.
Storage
Store completely cooled brownies in an airtight container at room temperature.
If you’re stacking them, place parchment paper between the layers to reduce sticking. Keep the container away from direct sunlight or a warm area because heat can soften the marshmallow topping.
For the best texture, enjoy the brownies within a few days. Over time, the brownie can become firmer and the marshmallow layer may lose some of its freshly baked softness.
Frequently Asked Questions
Can I use large marshmallows?
Yes. Large marshmallows can be cut into smaller pieces before being scattered over the brownie. Mini marshmallows are simply easier to distribute evenly.
Can I use marshmallow fluff instead?
Yes, but the texture will be different. Marshmallow fluff creates a spreadable layer rather than the distinct soft marshmallow pieces produced by mini marshmallows.
Can I make these brownies ahead?
Yes. Bake and cool them ahead of time, then keep them covered at room temperature until serving. For the cleanest appearance, add any decorative chocolate drizzle after the brownies have cooled.
Should marshmallow brownies be refrigerated?
They generally don’t need refrigeration for short-term storage. Keeping them tightly covered at room temperature helps preserve the brownie texture and prevents the marshmallow topping from becoming excessively firm.
How do I get clean slices?
Cool the brownies completely before cutting. Use a sharp knife and wipe it clean between cuts. Lightly greasing the blade can also help with the sticky marshmallow layer.
Can I freeze marshmallow brownies?
Freezing can change the texture of both the brownie and marshmallow layers. If you need to prepare them ahead, short-term airtight storage at room temperature is generally preferable for the best texture.
Final Thoughts
These marshmallow brownies bring together three textures in one dessert: a dense chocolate brownie base, soft marshmallows, and a smooth chocolate finish. The key to getting the best result is avoiding overbaking the brownie and giving the marshmallow layer only enough oven time to soften and lightly brown.
Once you’ve mastered the basic recipe, it’s easy to personalize the brownies with chocolate chips, peanut butter, toasted nuts, or a touch of flaky salt. The combination is simple enough for everyday baking but distinctive enough to earn a place on a party dessert table.